An inbound is every shipment of goods you send to our warehouse. Everything that follows — your stock going live, orders shipping on their own — depends on getting it right. Six steps, under five minutes.
Before you start
Have your store connected: the products in an inbound come from your catalogue. Not connected yet? Start here.
Know exactly what you're sending and how many units of each reference.
Decide who applies the labels: you before shipping, or us on arrival.
If you want us to collect, the earliest date is 2 working days away (no weekend pickups).
Always create the inbound before sending the goods. A pallet that arrives with no inbound behind it can't be identified or booked in.
1. Tell us what you're sending
Go to Entradas → Nueva entrada (Inbounds → New inbound) and pick the type: Productos (catalogue items you sell) or Packaging (boxes, filler paper, tape…).
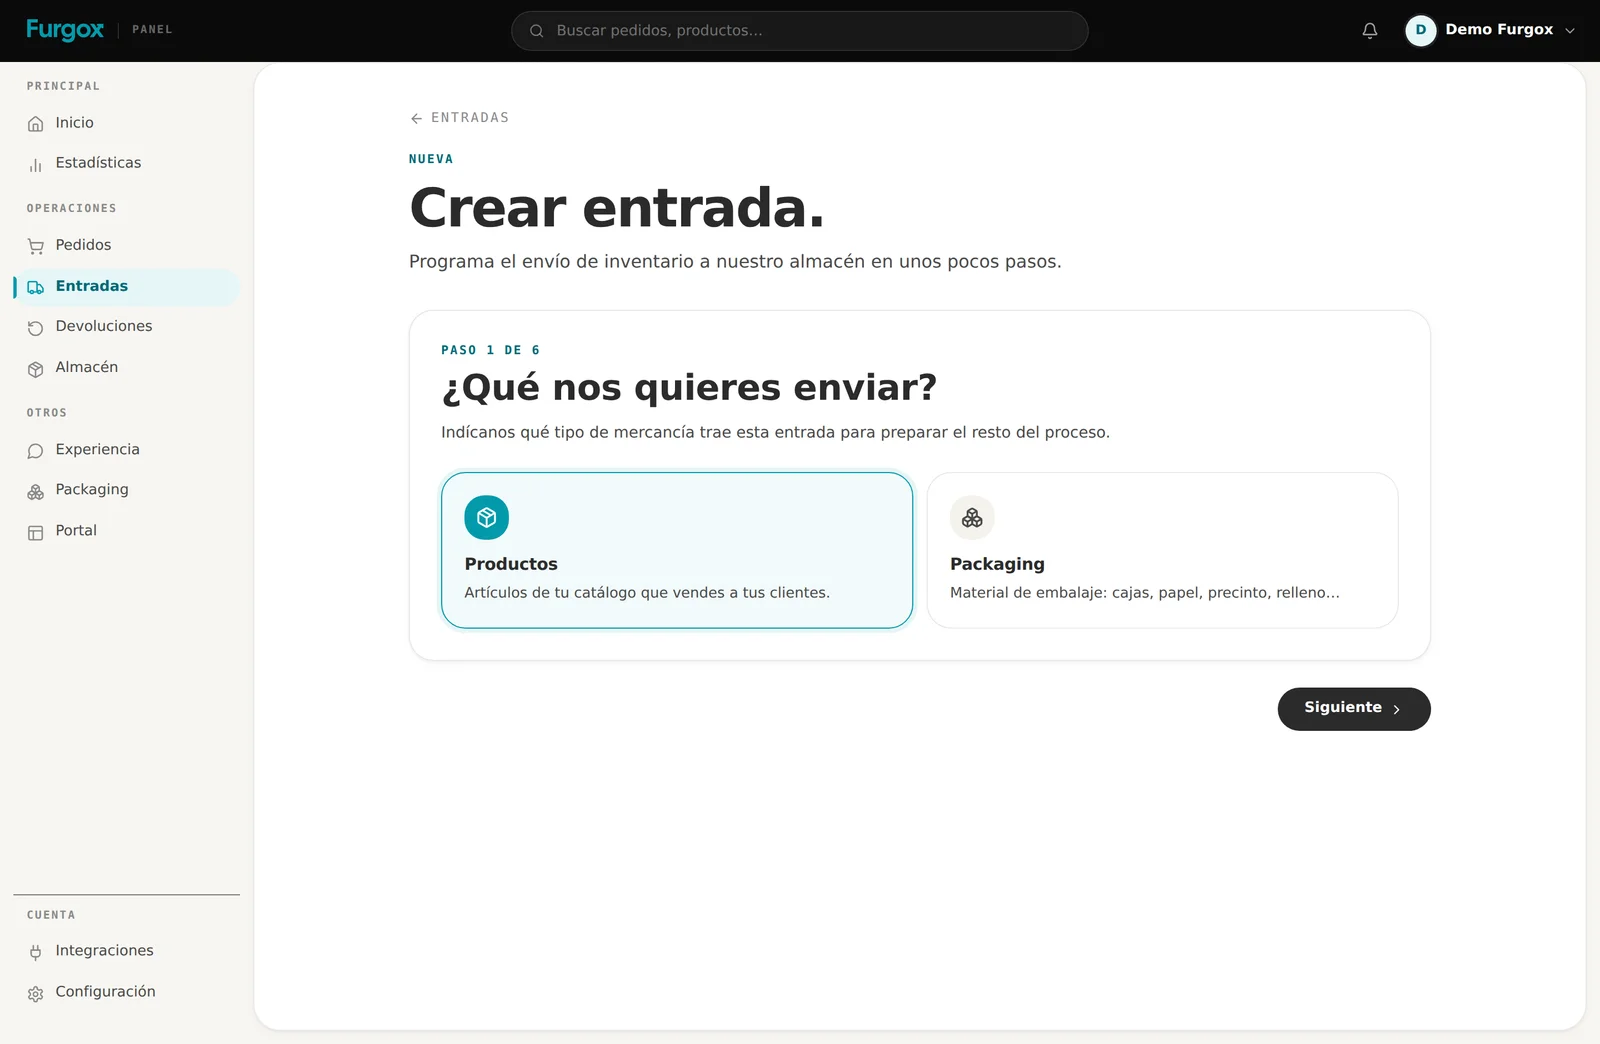
Don't mix both in one inbound: packaging isn't sold, it's consumed while picking orders, so it's tracked separately. If both travel in the same truck, create two inbounds.
2. Choose how the goods reach us
There are two options, and the choice changes the rest of the wizard.
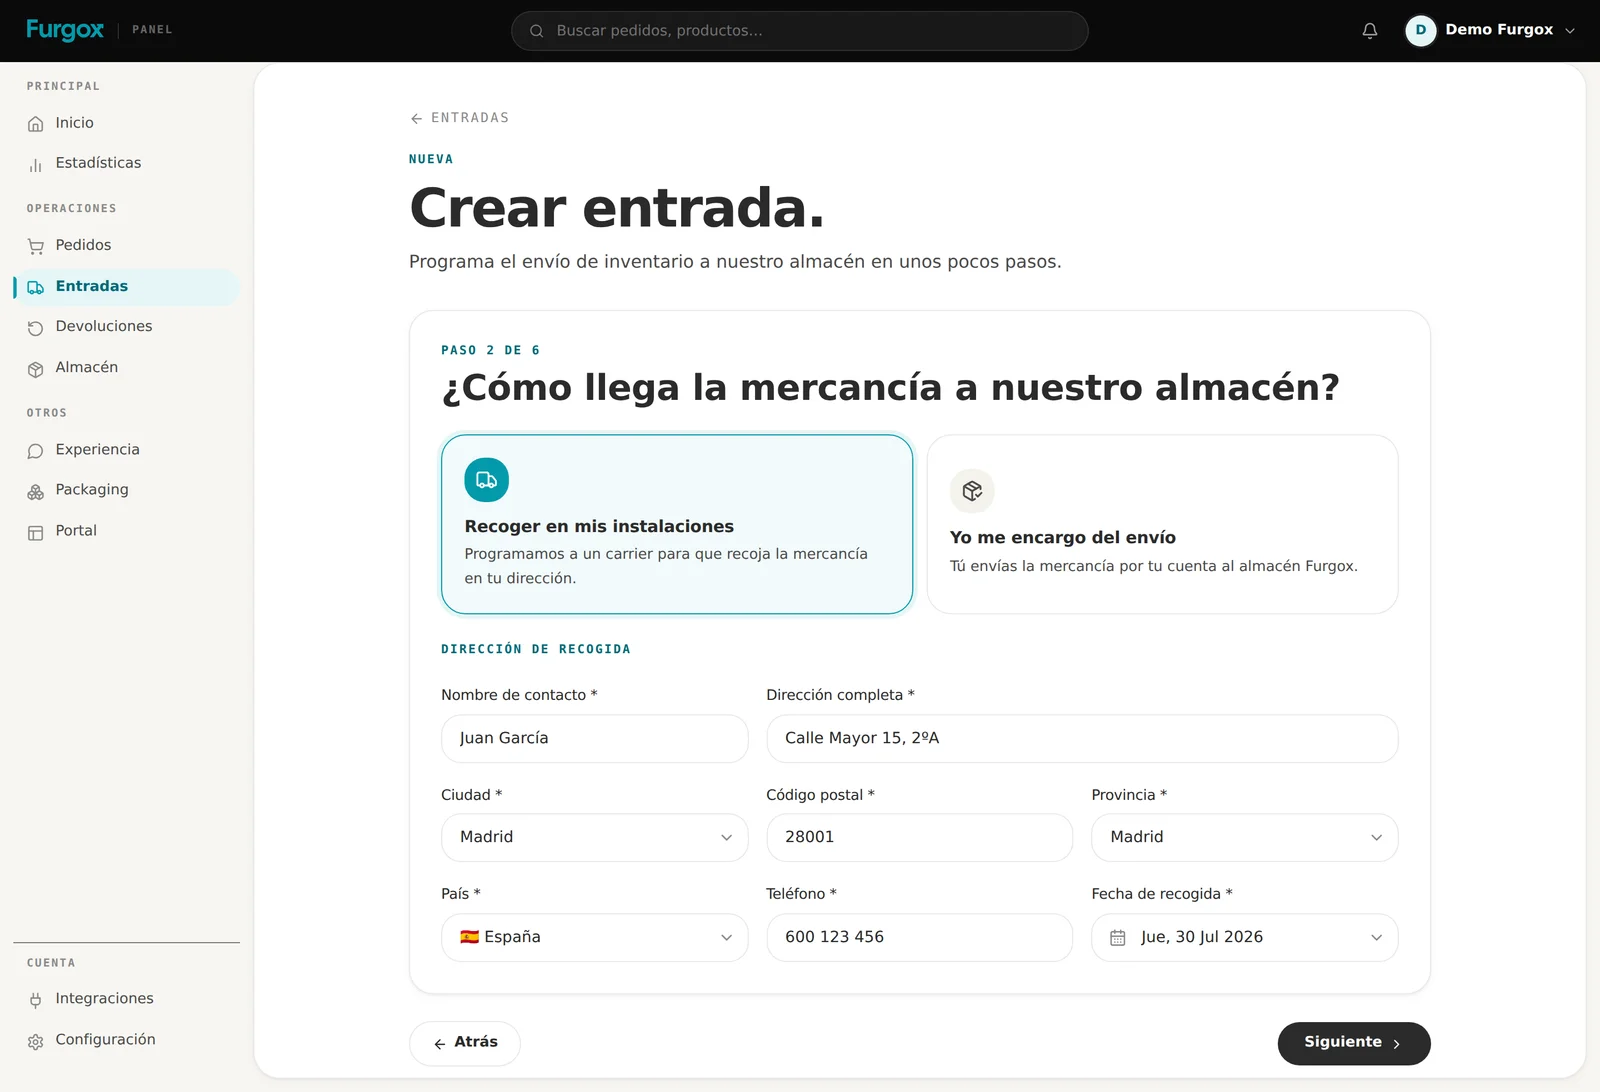
Collection at your premises
We book a carrier to collect at your address. You'll need the full address, a phone number someone actually answers (they call if they can't find the place) and the collection date.
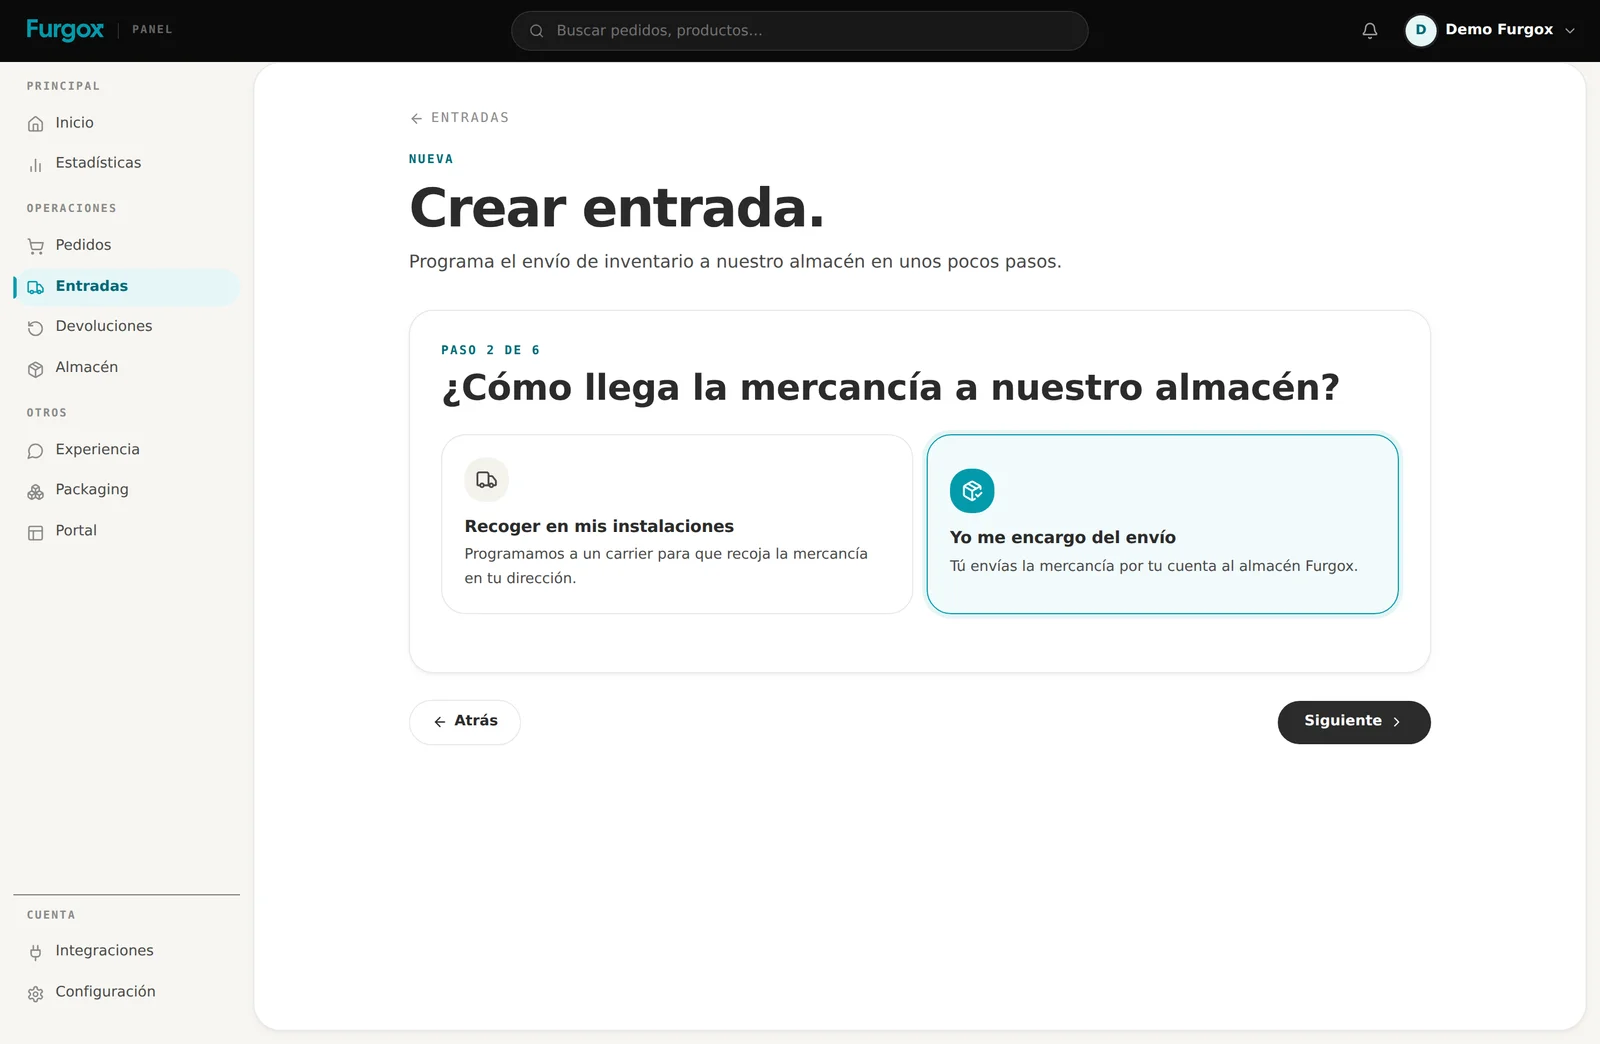
I'll handle the shipping
You send the goods yourself, with whichever carrier you like. The next step gives you the exact warehouse address.
3. Warehouse, packages and weight
Pick the destination warehouse. If you're shipping yourself, the shipping address appears right there to copy onto your carrier's label.
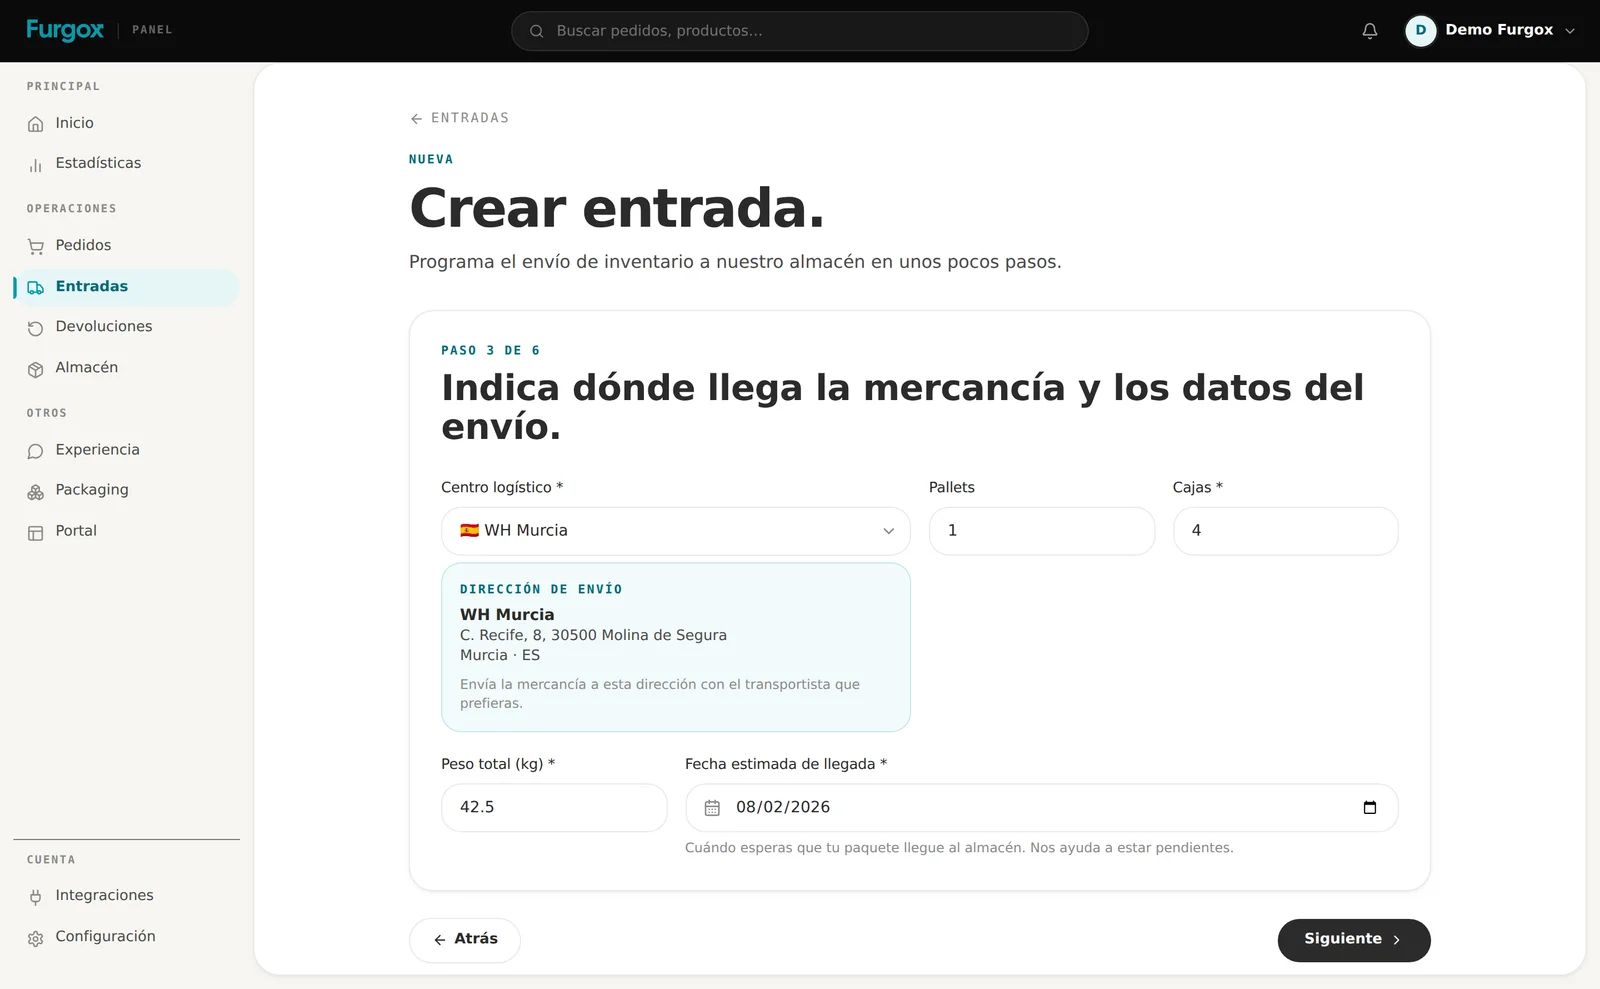
Pallets, boxes and weight aren't paperwork: they're what the warehouse counts on arrival. Declare 4 boxes and have 6 turn up, and the reception stops until it's sorted. Count the physical packages leaving your door.
4. Add products and quantities
Search each product by name or SKU and set the units. Quantities must be the real ones: we count unit by unit on arrival, and anything that doesn't match is logged as a discrepancy.
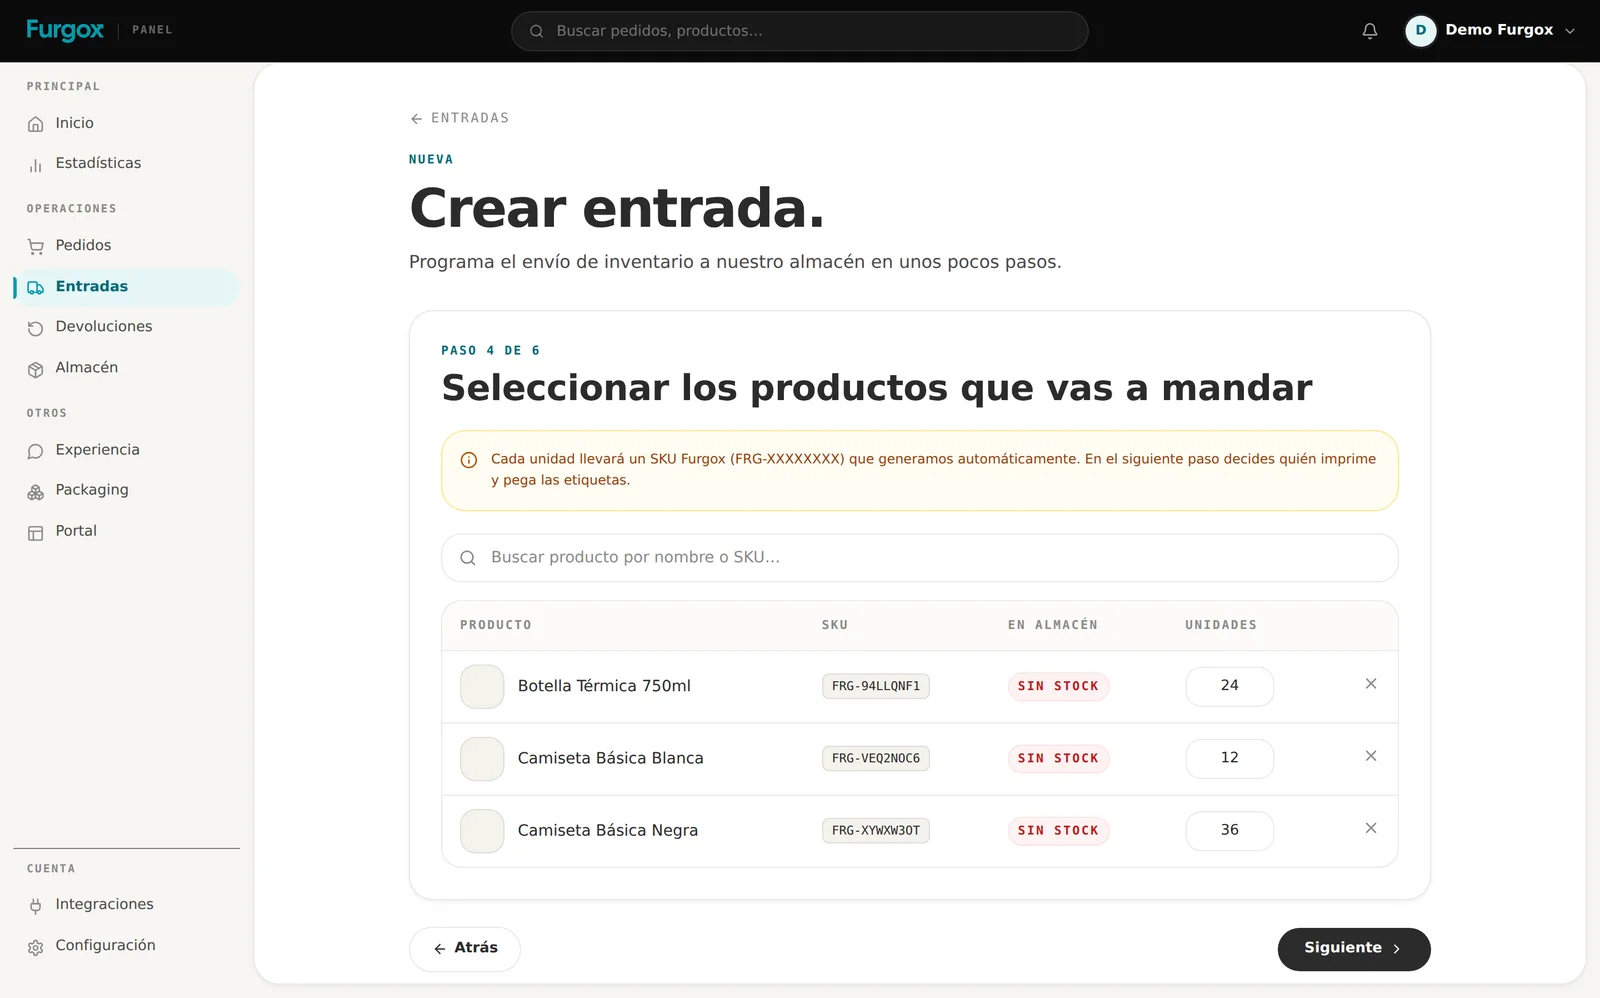
Every item gets a Furgox SKU (FRG-XXXXXXXX): it's the code we identify it by on the shelf. It's assigned here, the first time you include the product in an inbound, and it replaces whatever reference came from your store. On Shopify, PrestaShop and Squarespace we write it into your catalogue too, so both sides match.
5. Decide who labels
Every unit needs its SKU label. You can do it, or we can.
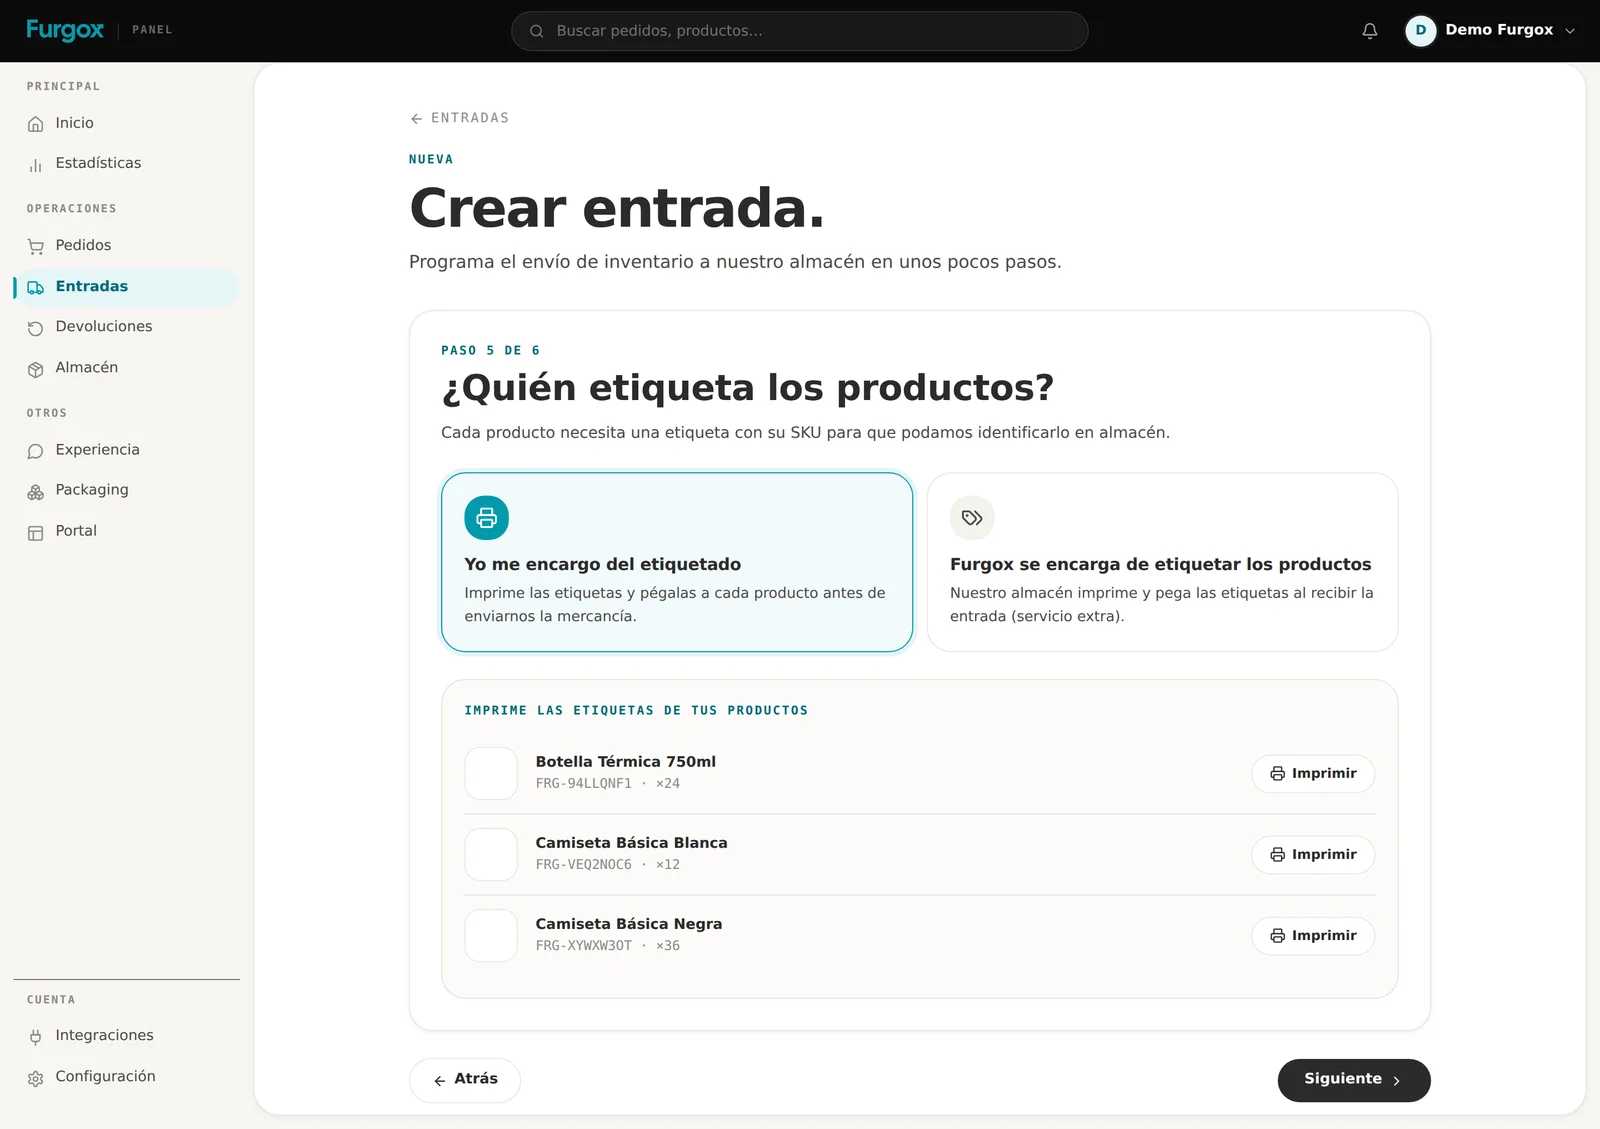
You handle labelling: print from the panel and apply the labels before shipping. No charge.
Furgox handles it: we print and apply on arrival. It's an extra service at €0.10 per unit, added to your next invoice.
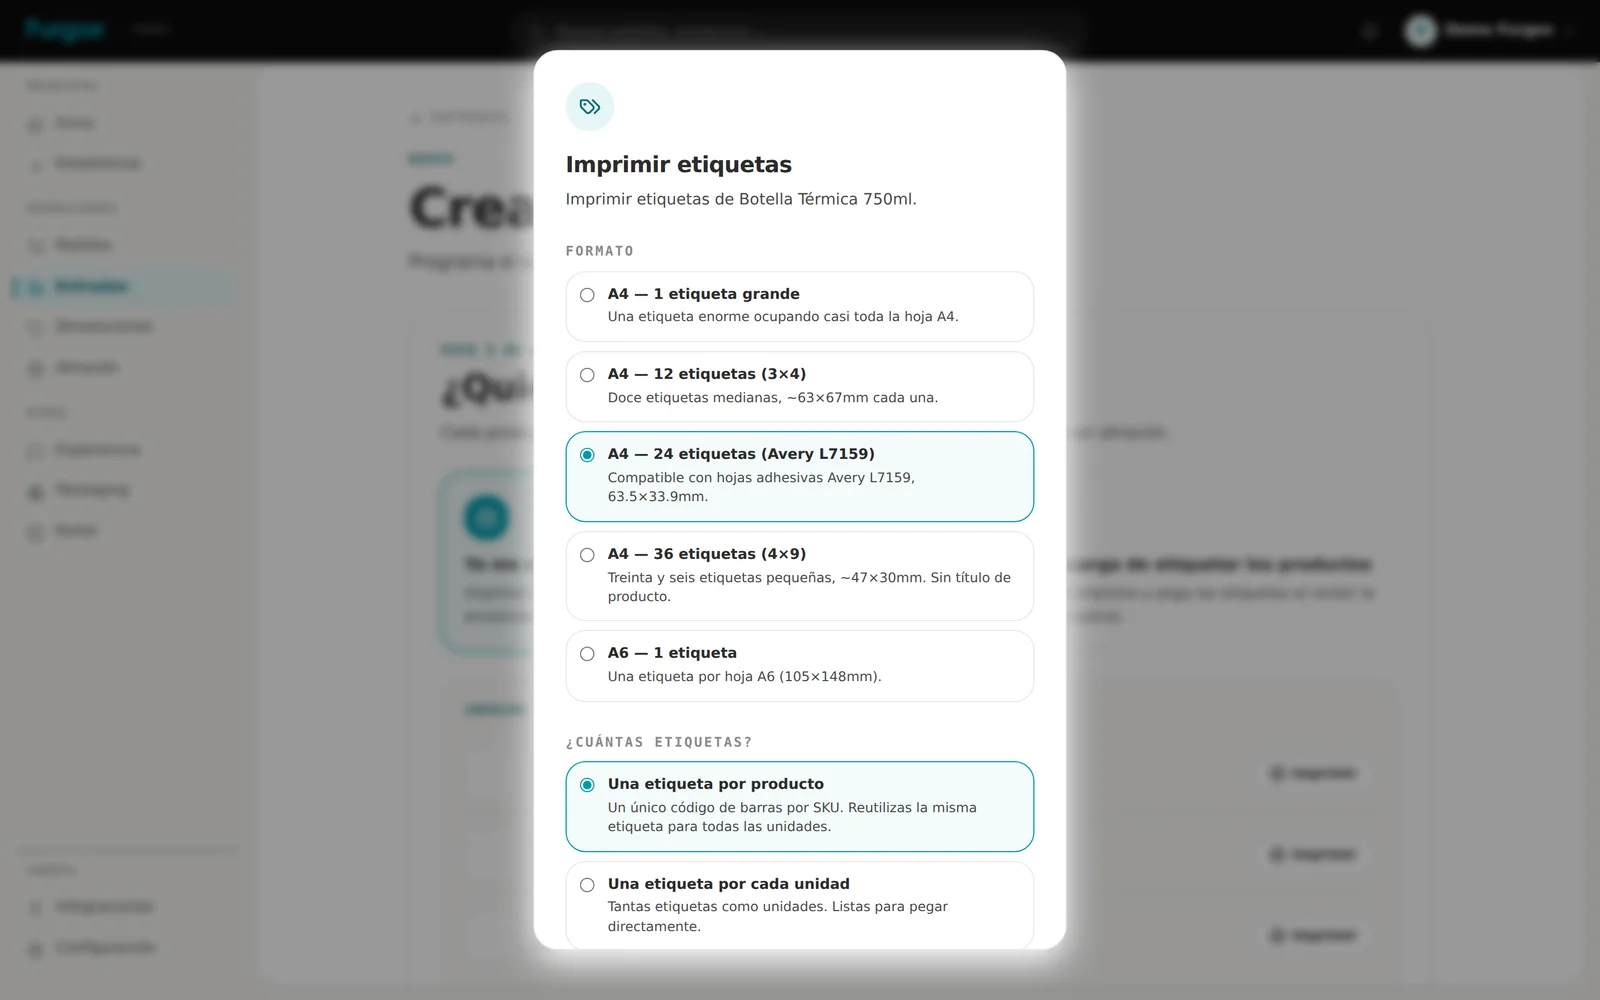
If you label them yourself, Imprimir (Print) lets you choose the sheet format (Avery L7159 with 24 labels included) and whether you want one label per product or one per unit.
Stick each label on a flat, visible face, not folded over a corner or covered with tape: if the scanner can't read it, that unit stops.
6. Review and confirm
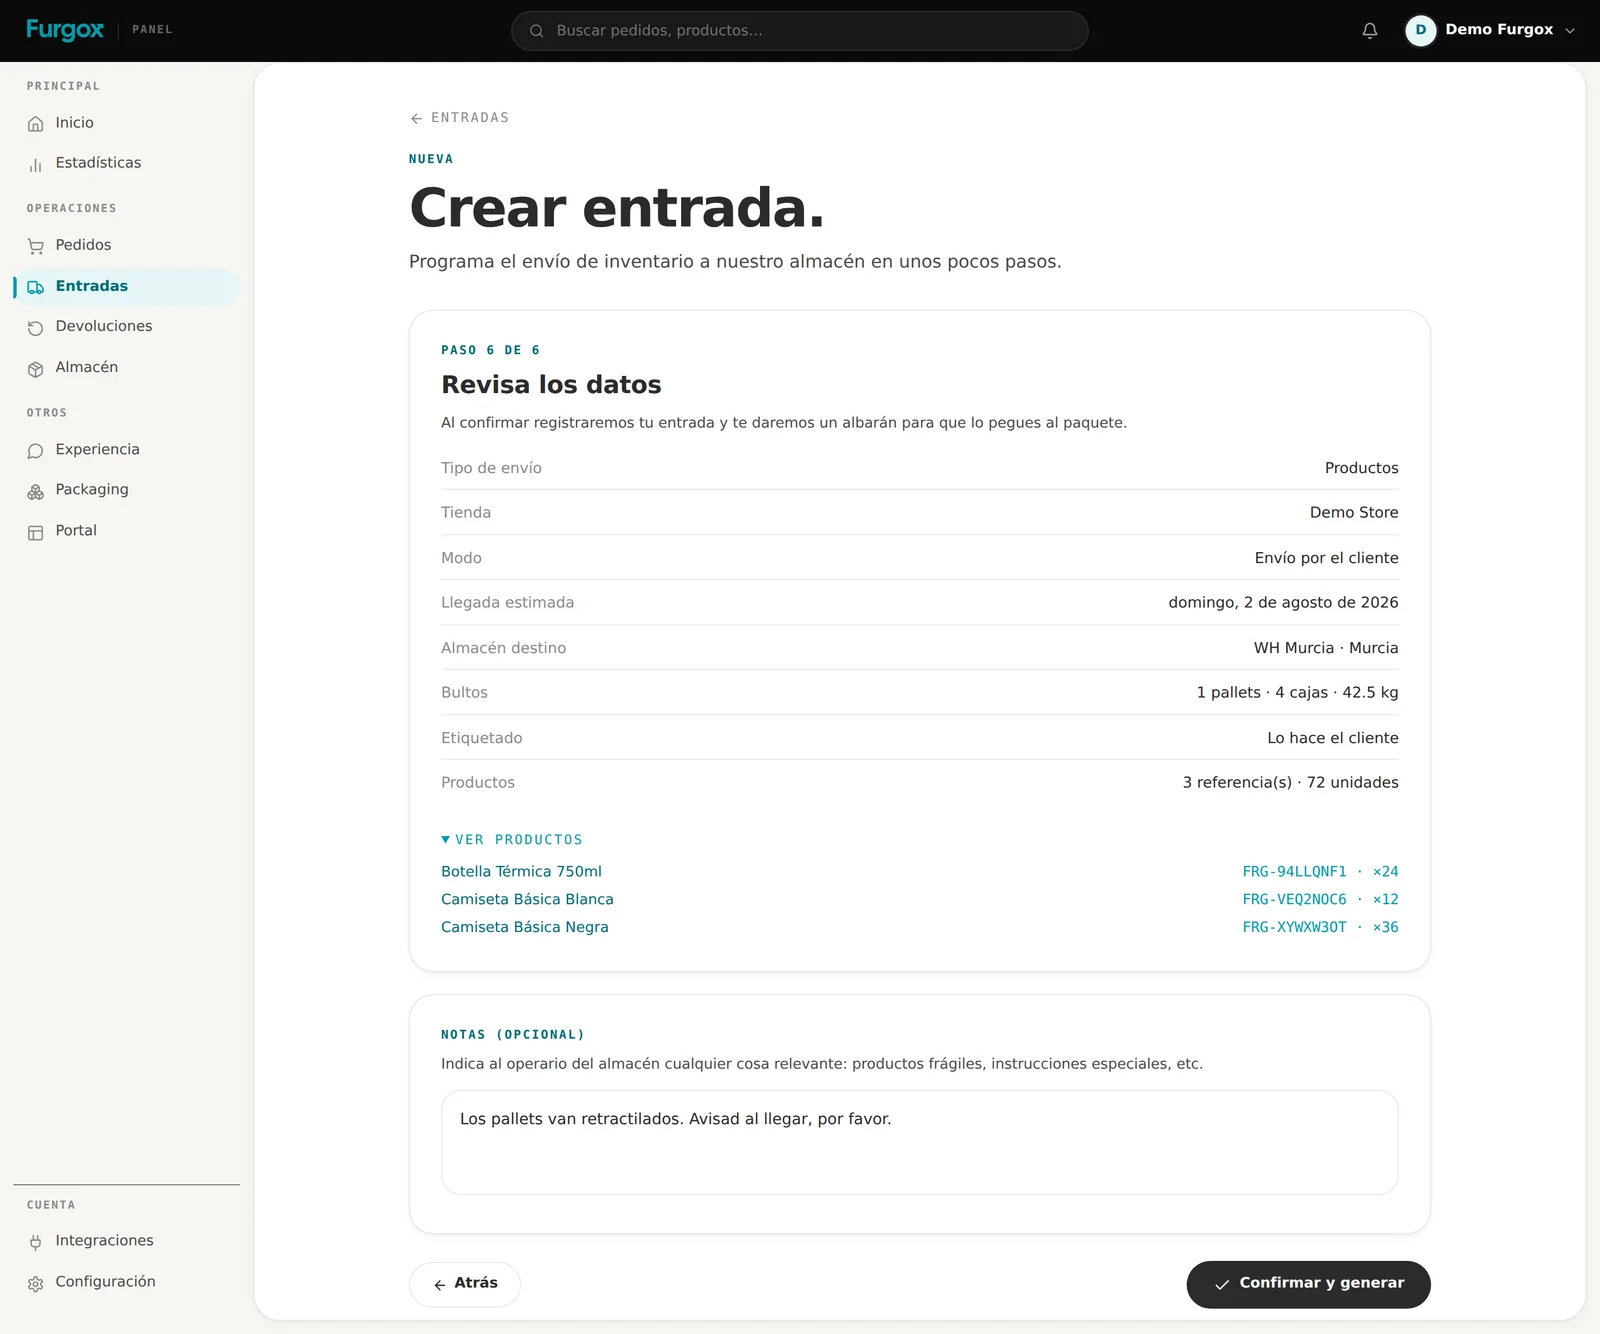
The last step summarises everything. Read it properly — especially the address, date and quantities — and use the notes field for anything the warehouse should know: shrink-wrapped pallets, fragile goods, whether you want a heads-up on arrival.
Interrupted halfway? The wizard saves a draft at every step. Pick it up again from the inbound list, in the row's ⋯ menu.
What to do after confirming
On confirmation, the final screen hands you the documents that make your goods identifiable on arrival. This isn't optional: without them, your inbound is an anonymous pallet on a loading bay.
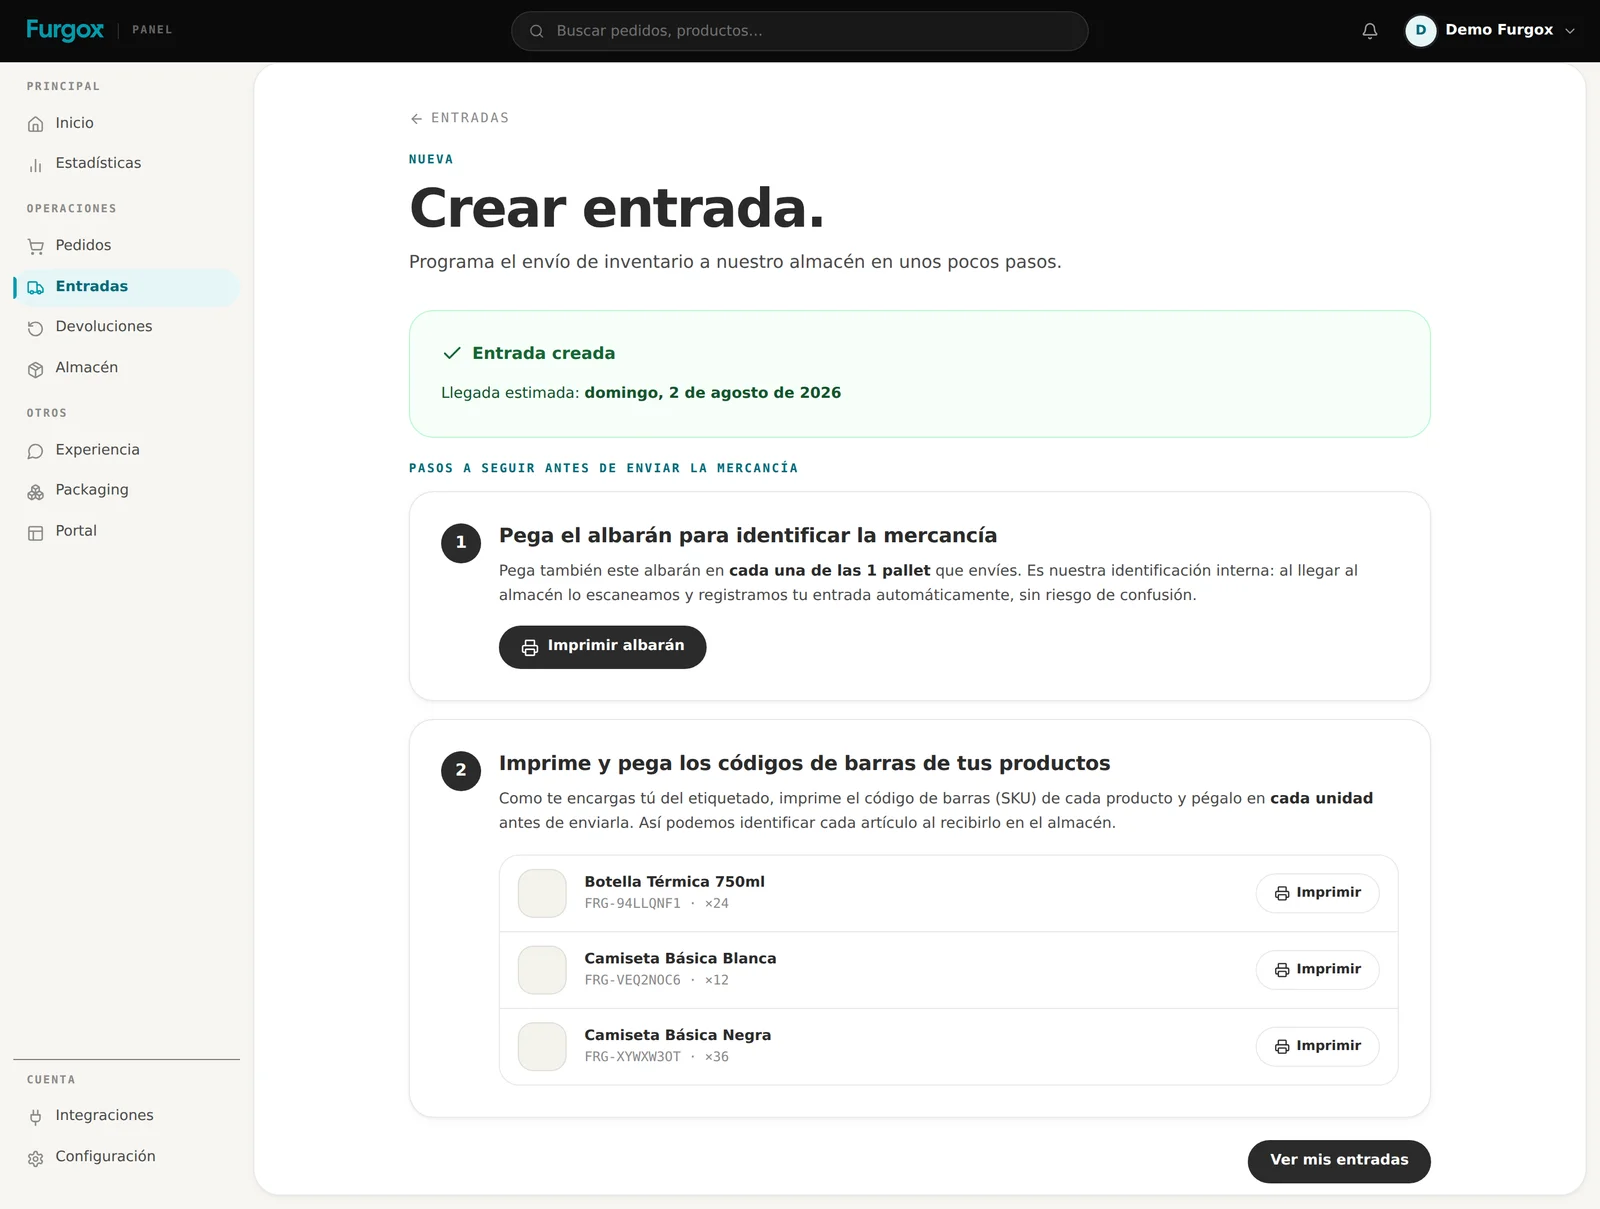
Carrier labels (only if you asked for collection): print them and stick them clearly visible on every package.
Delivery note: on every package, always. It's our internal identification; we scan it on arrival and your inbound books itself in.
Product barcodes (only if you're labelling): one label per unit, applied before you close the box.
How your inbound progresses
The inbound list shows the status of each shipment:
Borrador (draft): not confirmed yet. We're not expecting anything.
Pendiente (pending): confirmed, waiting to leave or to arrive.
En tránsito (in transit): the goods are on their way.
Llegada (arrived): at the warehouse, waiting to be processed.
Procesando (processing): we're counting, checking and putting it away.
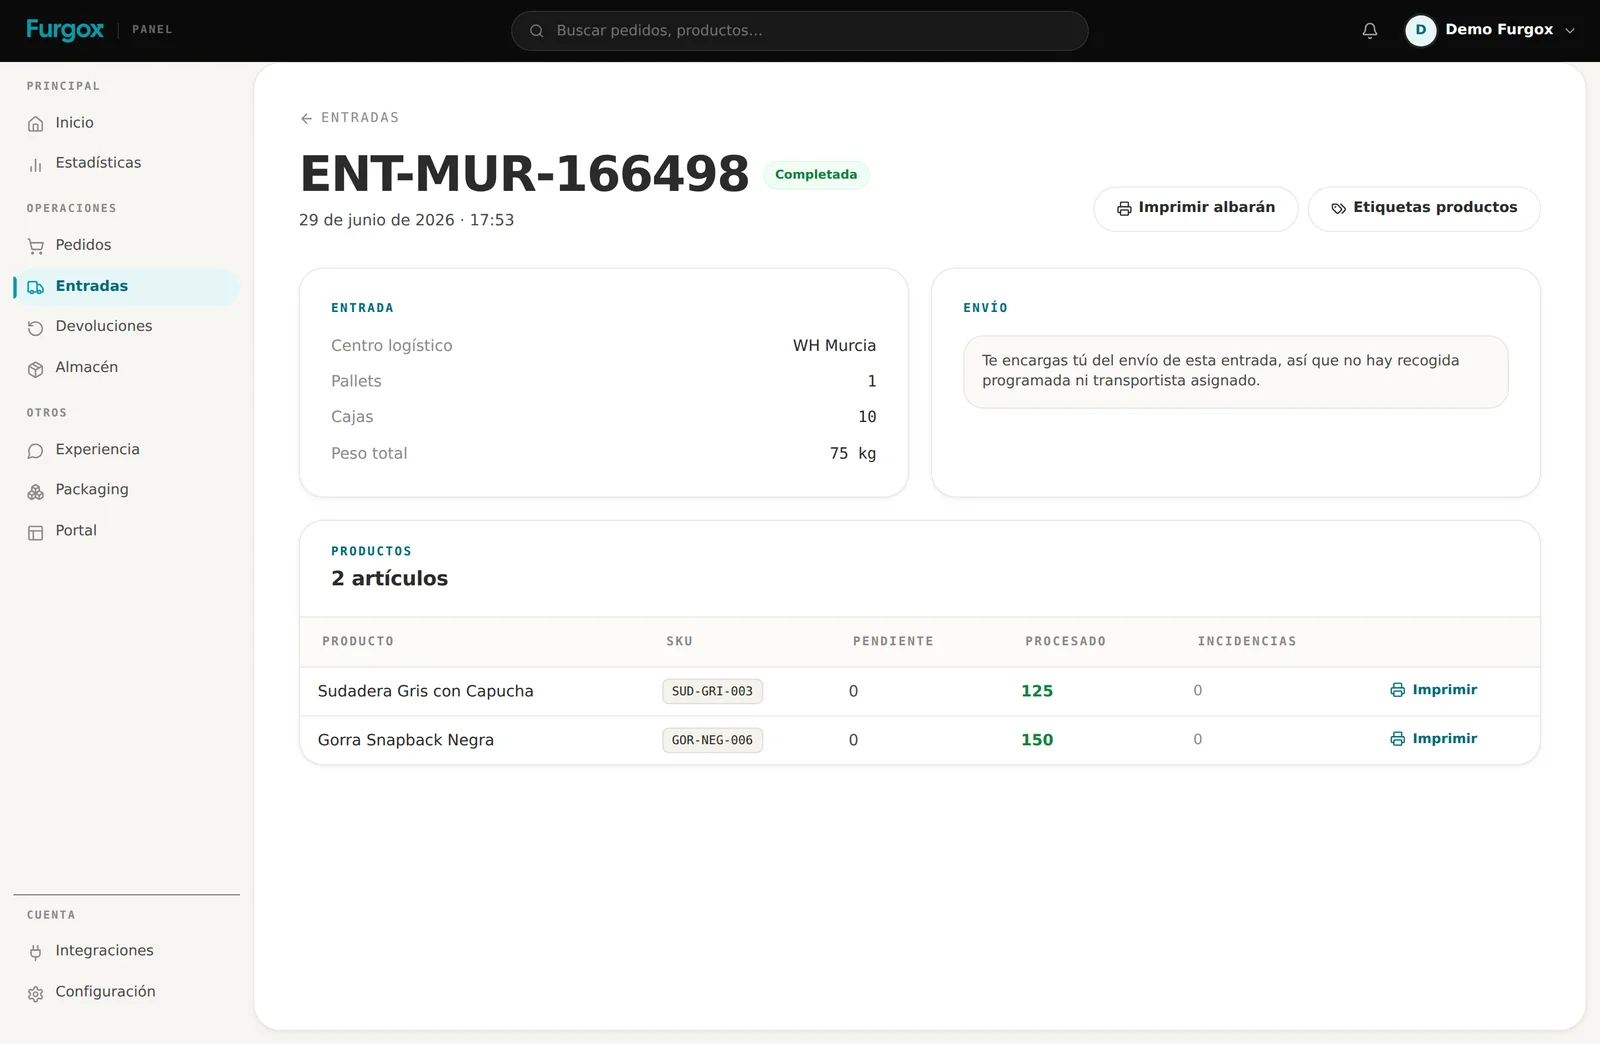
Completada (completed): all in. Stock is available and published to your store.
Cancelada (cancelled): called off before processing.
Opening an inbound shows the detail product by product: how much is still pending, how much is processed and how many discrepancies we found.
The five mistakes that delay inbounds most
Sending goods without creating the inbound first. There's no way to know whose they are.
Forgetting the delivery note, or sticking it on one box out of six.
“Approximate” quantities. Every difference becomes a discrepancy we have to resolve with you.
Badly declared packages: 3 pallets that are really 5, or a weight nowhere near the real one.
Unreadable labels: printed too small, creased, taped over or stuck on a fold.
FAQ
Can I cancel an inbound?
Yes, from its detail page, as long as we haven't started processing it. Once it's Procesando or Completada, write to us.
Can I change quantities after confirming?
A confirmed inbound can't be edited. If the shipment changes a lot, cancel it and create a new one; for a small adjustment, tell the warehouse in the chat — we count what actually arrives.
When can I sell what I sent?
As soon as the inbound turns Completada. From then on we publish the available units to your store.
What if I send more references than I declared?
Anything undeclared can't be booked in blind: it's held until we clear it with you. Adding it to the inbound before shipping is far quicker.
Questions about a specific inbound? Message us from the chat in your panel with its reference and we'll look at it together.