Unlike Shopify or WooCommerce, PrestaShop has no authorisation screen. The connection is made with a Webservice API key that you create in your back office and paste into Furgox. It takes five minutes, with no code and nothing to install.
Before you start
You need to log in to your store's back office as an administrator.
Have your store address handy. If PrestaShop is installed in a subdirectory, include it (
mystore.com/shop).URL rewriting must be enabled on your server: the PrestaShop webservice needs it in order to answer.
1. Enable the webservice
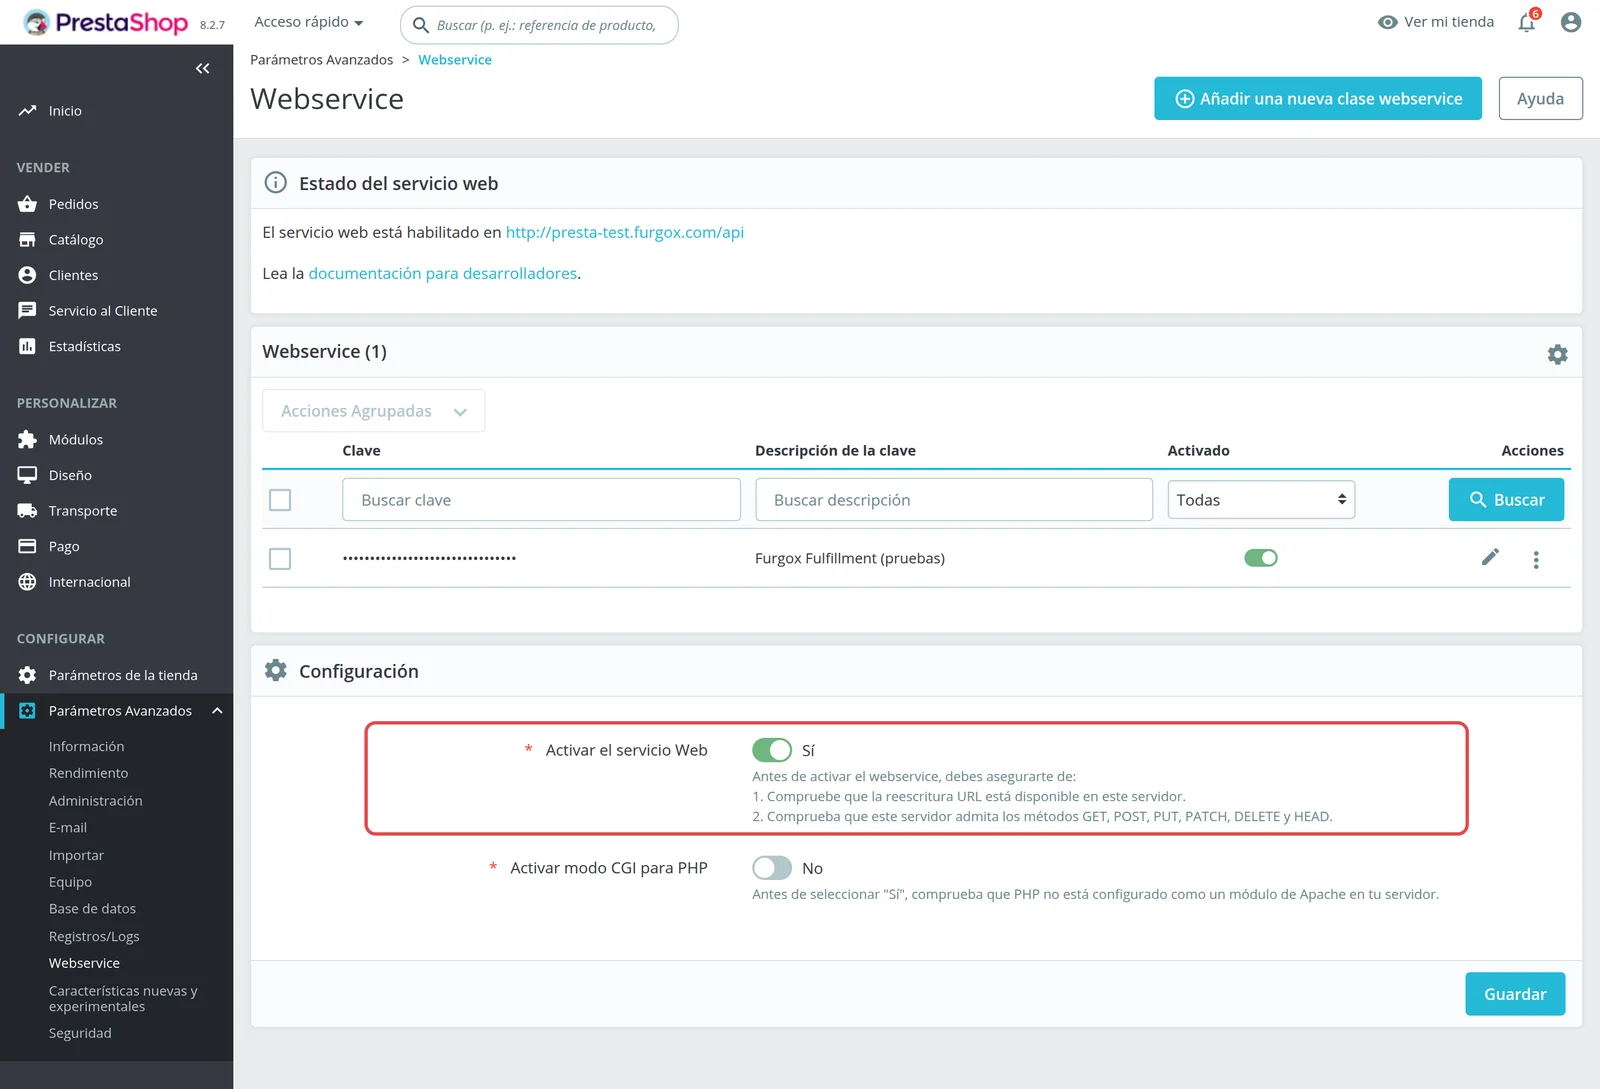
In the back office, go to Advanced Parameters → Webservice. At the bottom, under Configuration, set Enable PrestaShop's webservice to Yes and save. If it was already on, move to the next step.
2. Create a key for Furgox
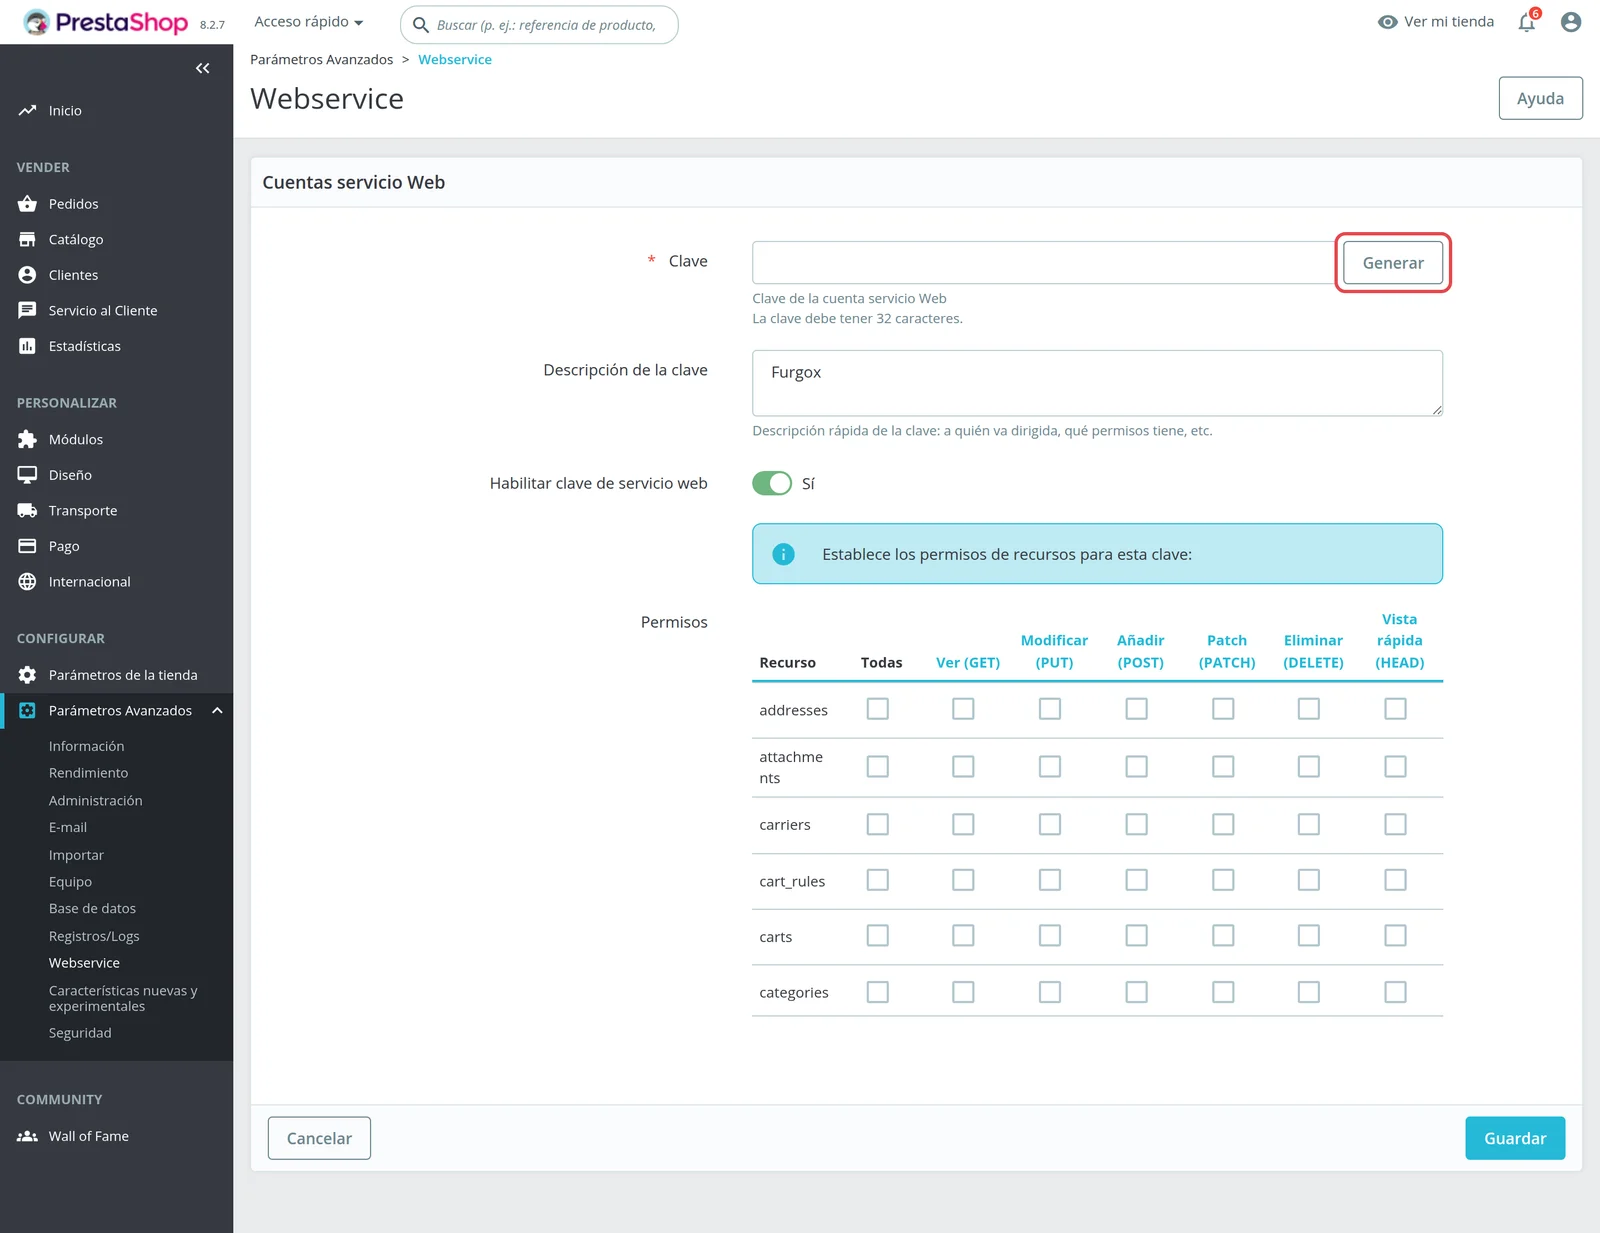
Click Add new webservice key. On the form:
Click Generate so PrestaShop creates the key, and copy it — you'll need it in step 4.
In Key description write
Furgox, so you recognise it later.Leave Enable webservice key set to Yes.
3. Tick the permissions
In the Permissions table on that same screen, tick View (GET), Modify (PUT) and Add (POST) for these resources, then save:
products, combinations, stock_availables, orders, order_states, order_histories, order_carriers, customers, addresses, countries
What we use each group for:
Products and stock: read your catalogue and combinations, and update available units.
Orders and statuses: import paid orders and keep their status up to date.
Customers and addresses: know where each order has to go.
Order carriers: write the tracking number when the parcel leaves the warehouse.
You don't have to get it right first time: when you connect, we check the key and tell you exactly which resources are missing.
4. Paste the key into Furgox
In your panel, open Integraciones (Integrations), click Conectar tienda, choose PrestaShop and fill in your store URL and the key you copied. Then click Conectar con PrestaShop.
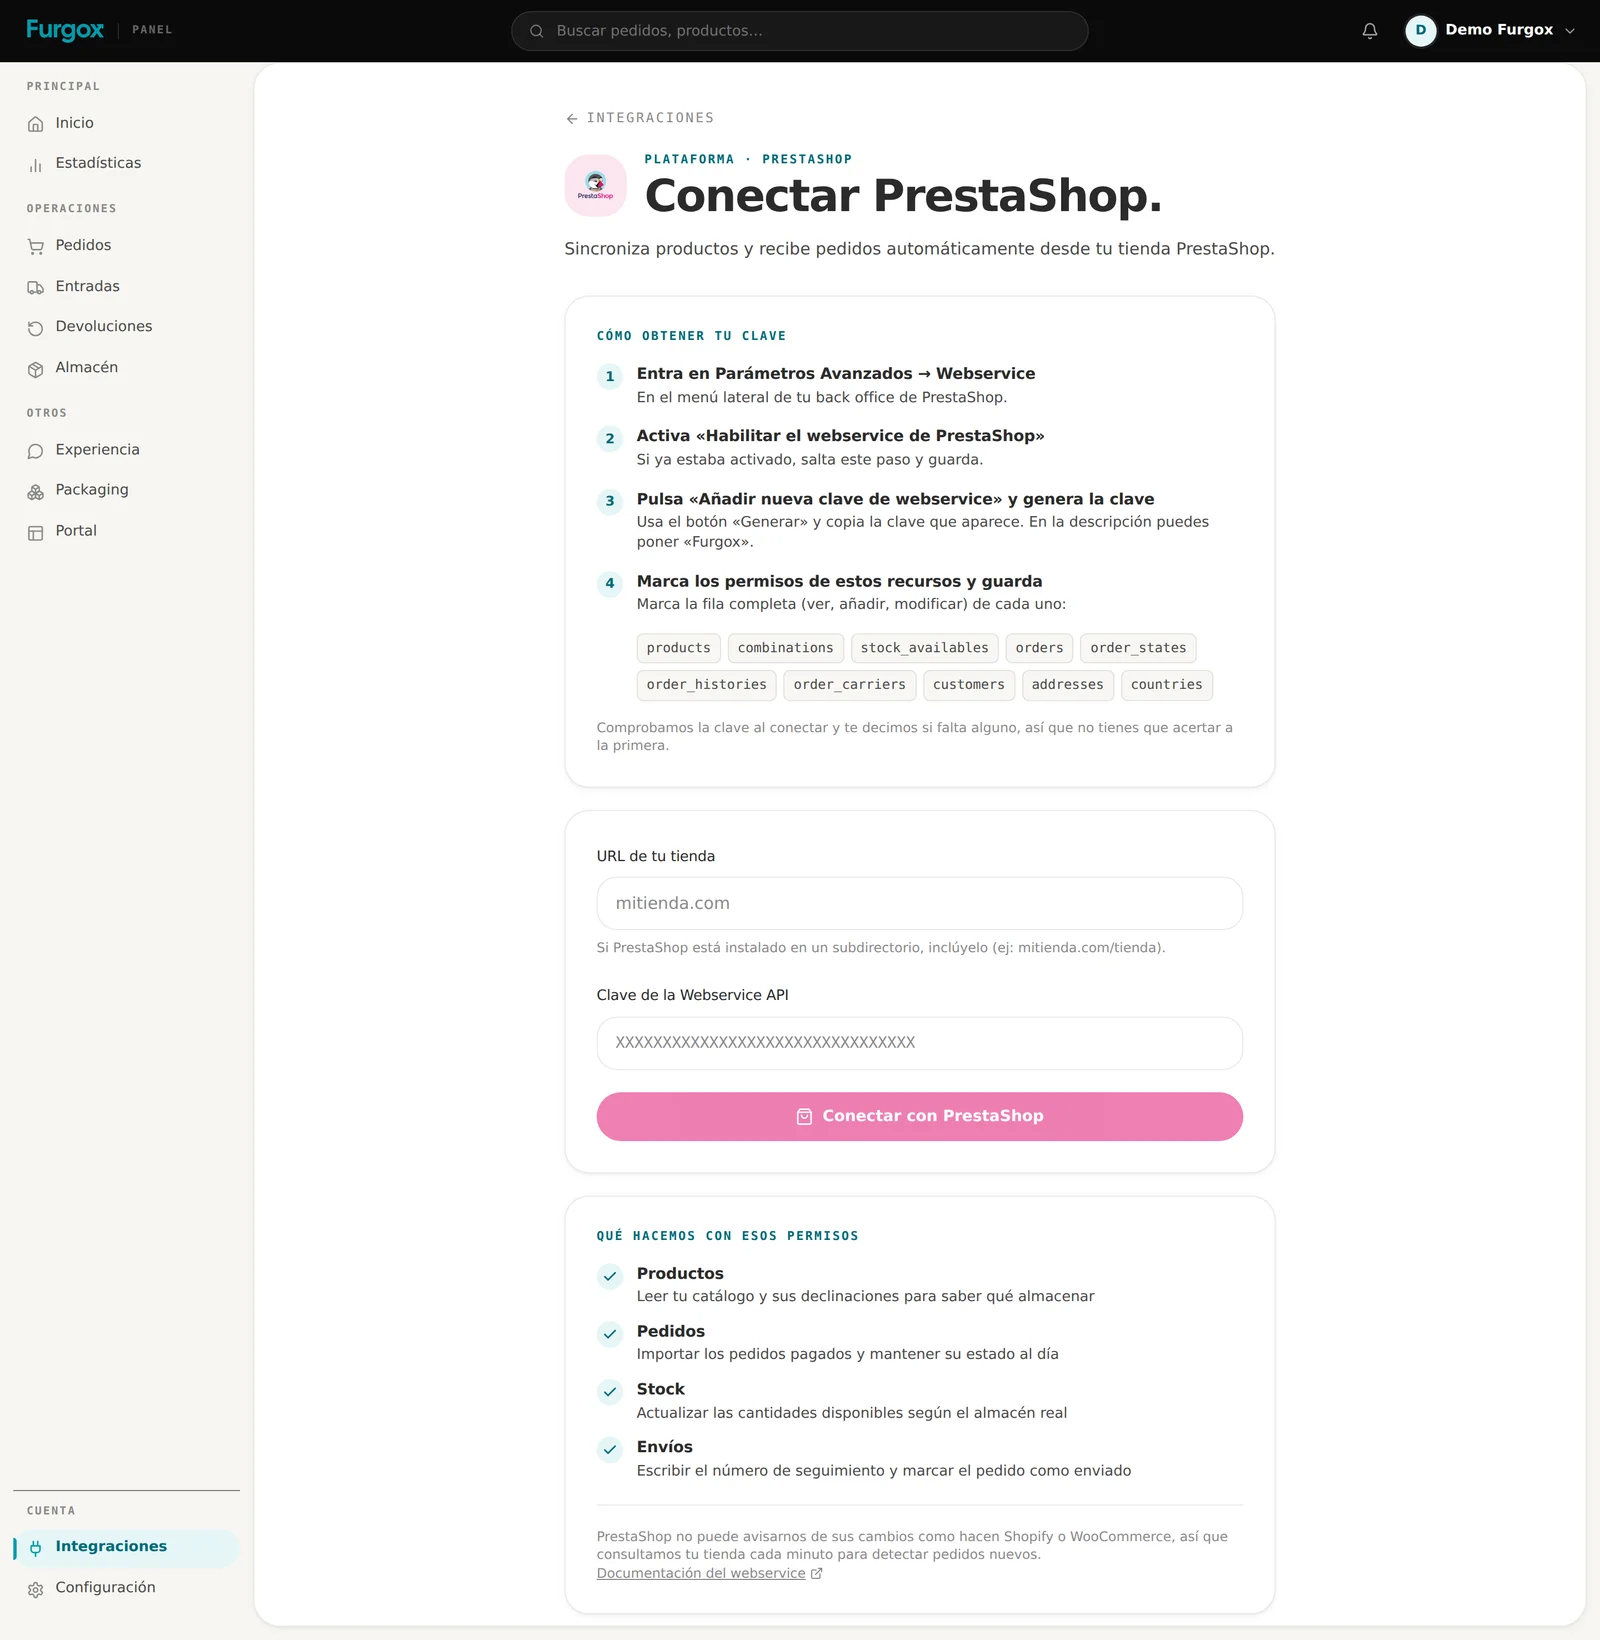
This takes a little longer than on other platforms, because we read your catalogue and your orders right away. On large stores it can take a minute — don't close the tab.
5. Done: your store is connected
What happens from now on
Products
We import your products and their combinations. When several combinations share the same reference, we assign each one its own SKU so they can be told apart in the warehouse.
Orders
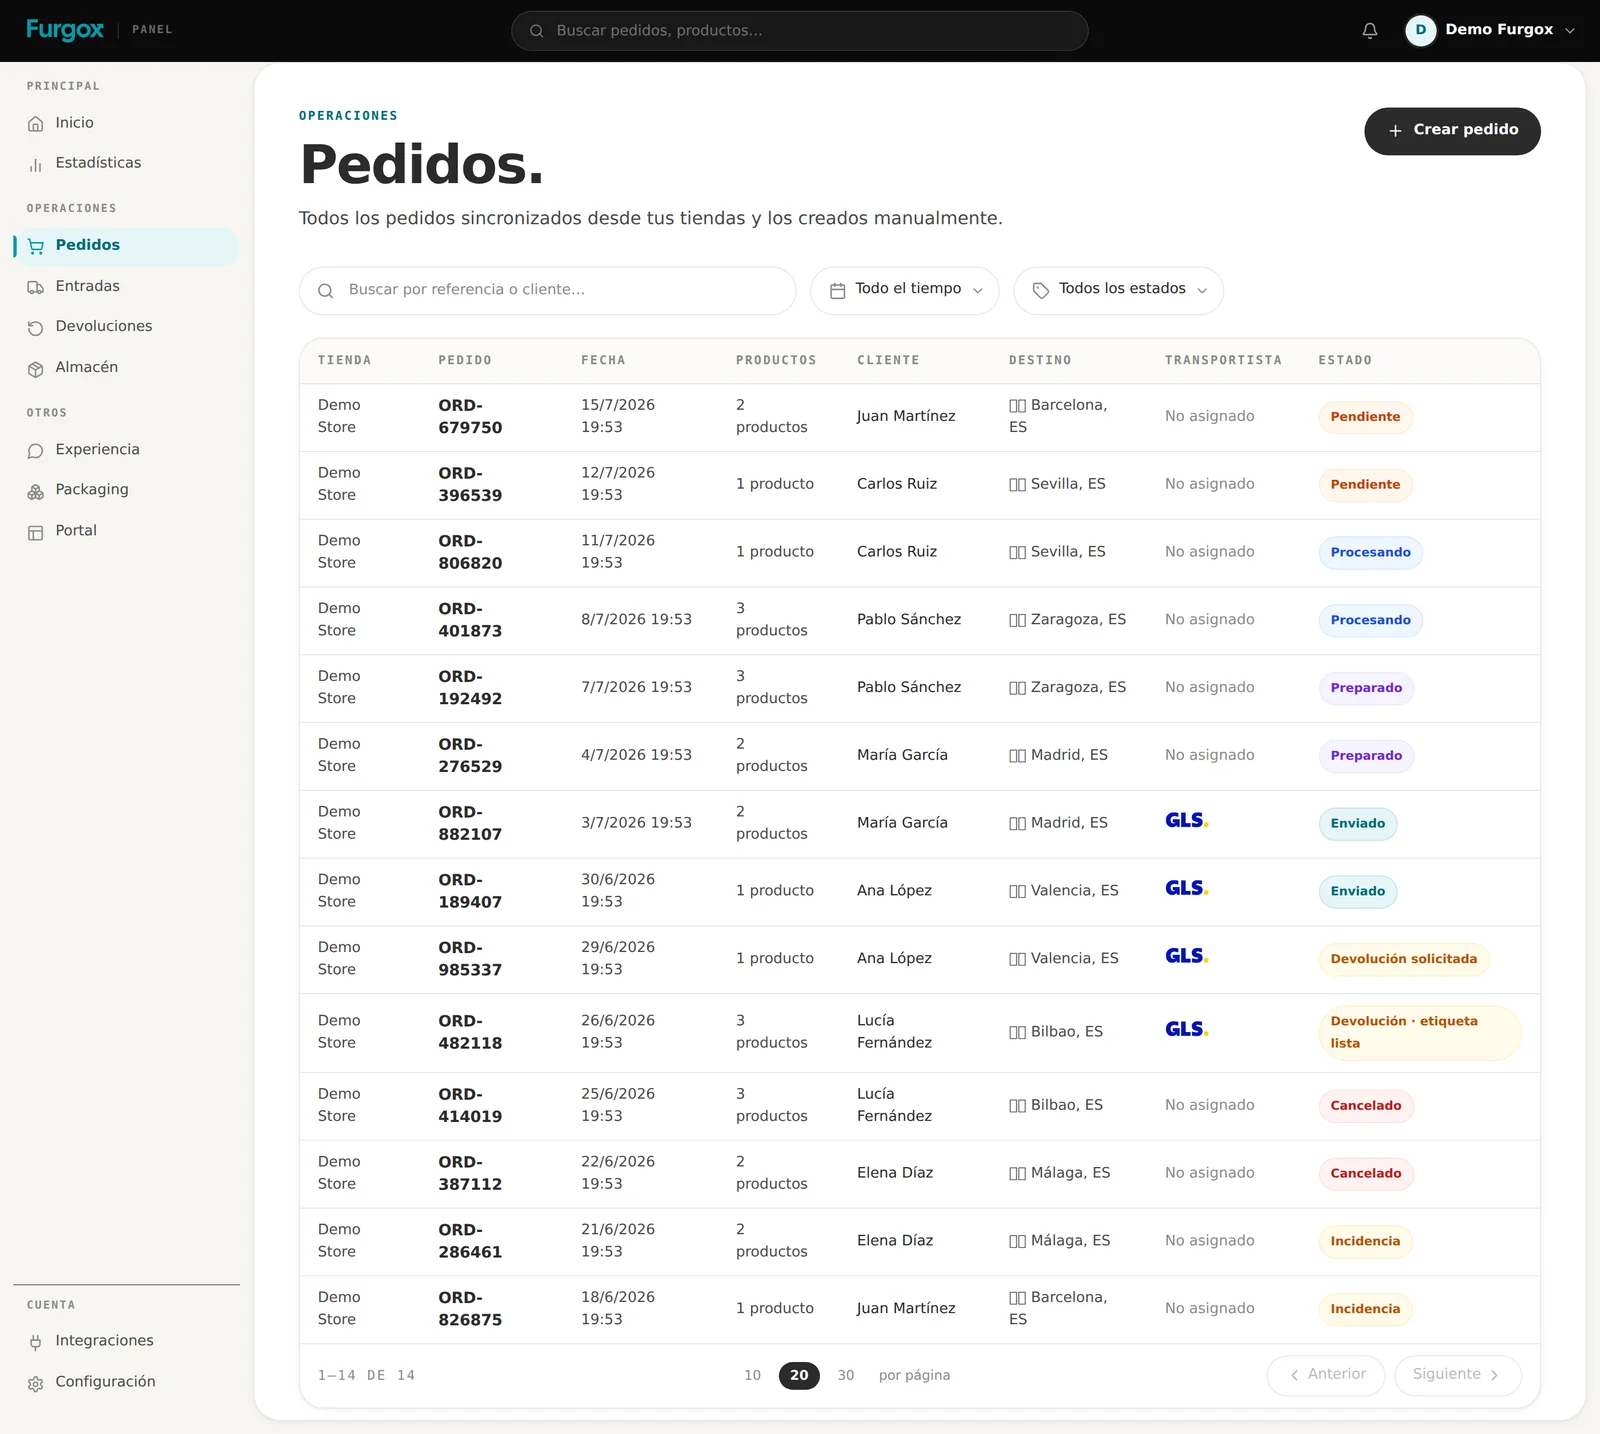
We import paid orders. Unpaid ones are held and come in on their own as soon as your store confirms payment; cancelled orders and payment errors are discarded.
Stock
We publish the real warehouse units back to PrestaShop as goods arrive and orders go out.
Shipping
PrestaShop does have native tracking: we write the tracking number on the order's carrier — the same one your customer sees in their account and in the email — and then move the order to the Shipped status.
Get orders instantly (optional)
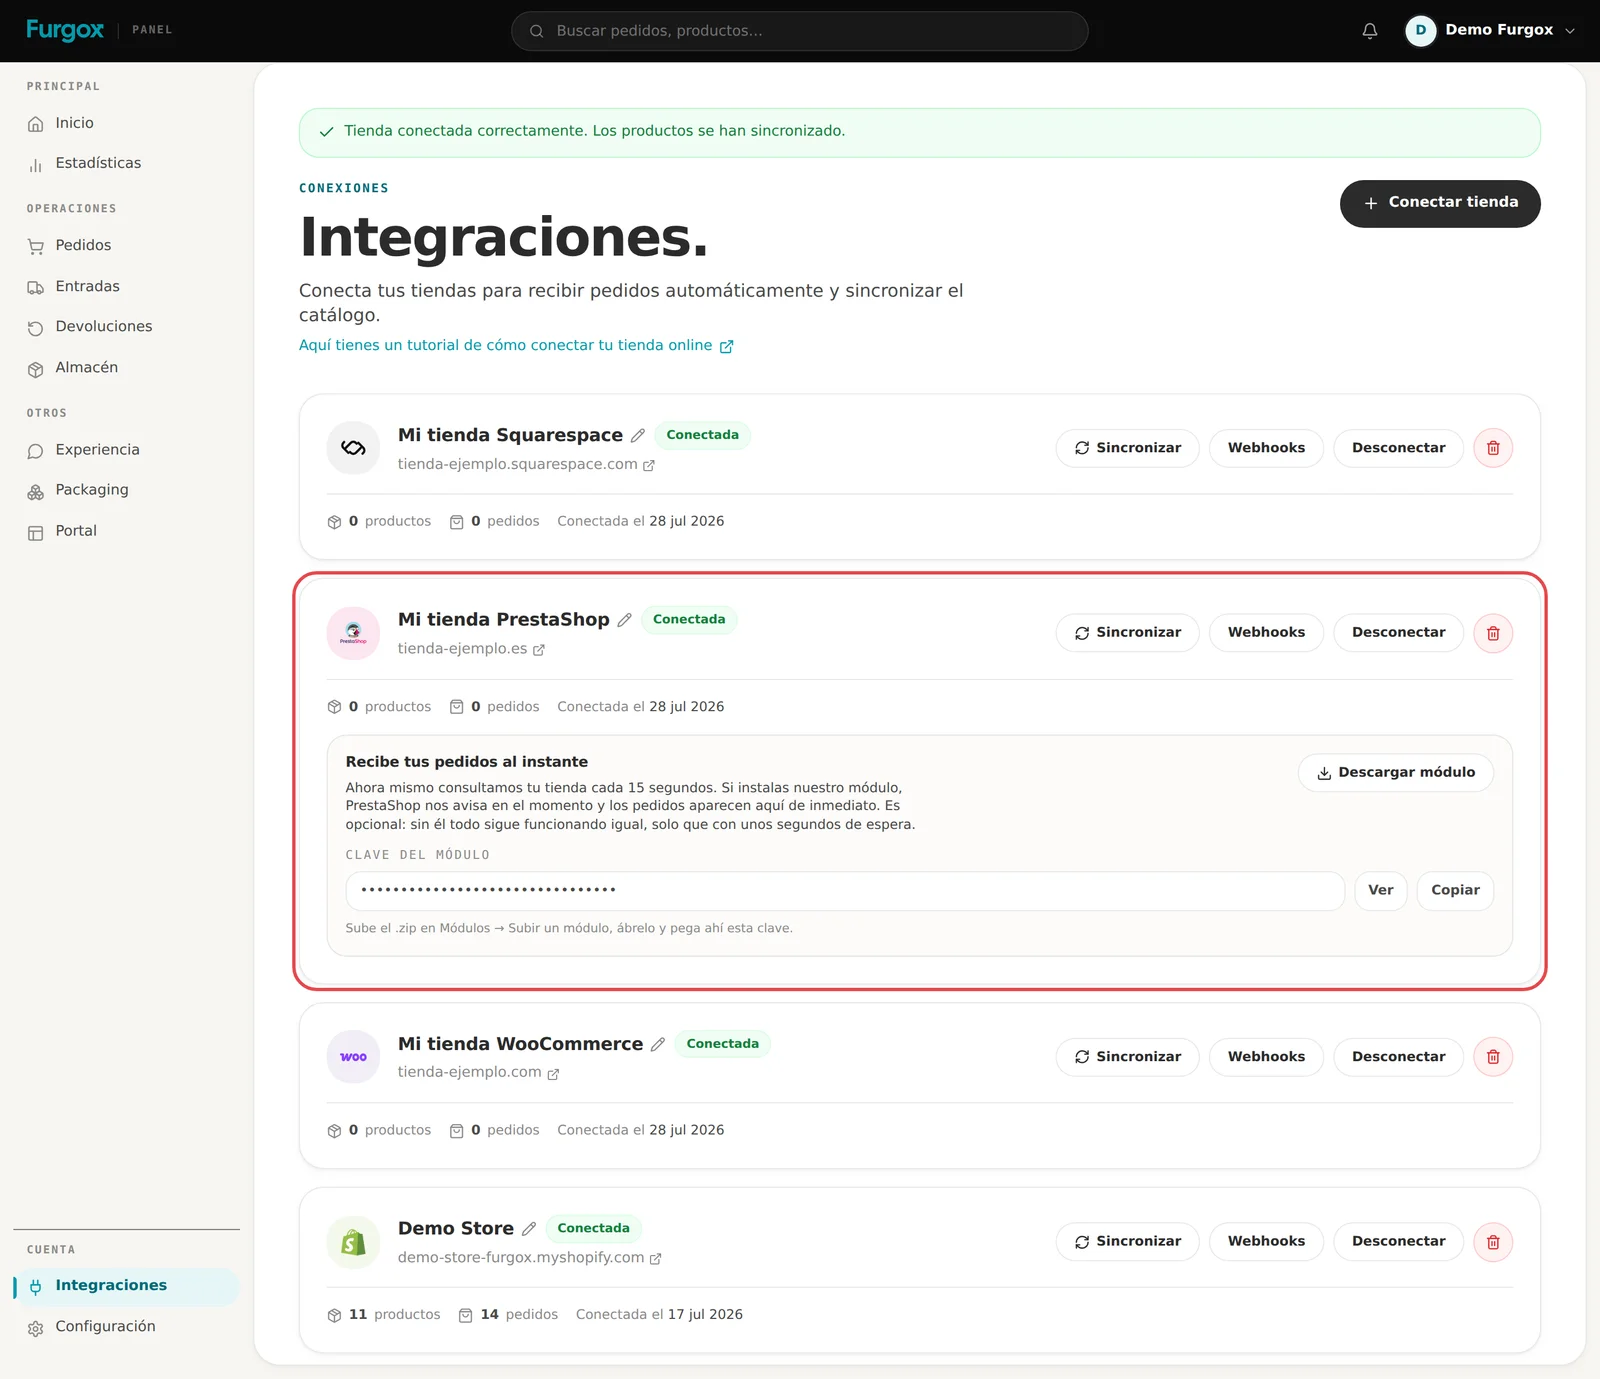
PrestaShop can't notify us of what happens in your store, so we poll it every 15 seconds. That works well, but if you want orders to appear the moment they're placed, install our Furgox Sync module:
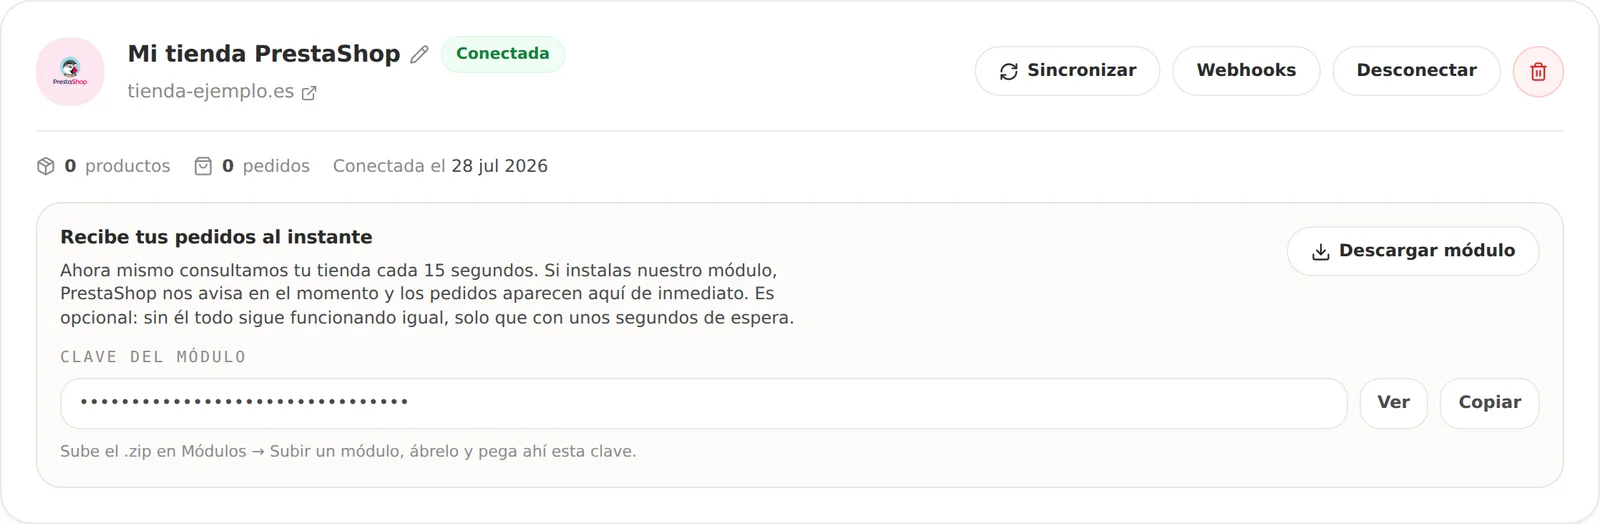
In Integraciones, on your PrestaShop store card, click Descargar módulo (Download module) and copy the module key shown just below.
In your back office, go to Modules → Module Manager → Upload a module and upload the
furgoxsync.zipfile.Click Configure and paste the module key. The panel address is already filled in.
It's optional: without it everything still works, just with a few seconds' delay. And even with it installed, we keep polling as a safety net.
If something goes wrong
“The key is not valid or is disabled”
Check that you copied it in full (32 characters) and that its status is Yes under Advanced Parameters → Webservice.
“Your store's webservice is disabled”
Go back to step 1: the web service still needs to be enabled in that screen's configuration.
“We can't find the API at that address”
Check the URL. If PrestaShop lives in a subdirectory, include it. If your store is in maintenance mode, your IP has to be on the allowed list for the API to answer.
“The key is missing permissions”
We tell you which resources are missing. Go back to the key in your back office, tick those rows and hit Connect again.
What if I change the key?
If you delete or regenerate the key in PrestaShop, syncing stops. Create a new one and connect the store again from the panel.
Stuck halfway? Message us from the chat in your panel and we'll finish it with you.