WooCommerce connects to Furgox through the authorisation wizard it ships with: there's no plugin to install and no keys to copy by hand. You type your store address, approve the connection from your WordPress, and we take care of the rest.
Before you start
You need to log in to your WordPress as a store administrator.
Your store must be on HTTPS. WooCommerce won't hand over API keys over an unencrypted connection.
Permalinks can't be set to “Plain” (Settings → Permalinks). The WooCommerce wizard lives at an address like
/wc-auth/v1/authorize, and without pretty permalinks it returns a 404.Your store must be reachable from the internet: at the end of the process it's your WooCommerce server that sends us the keys.
1. Open Integrations and choose WooCommerce
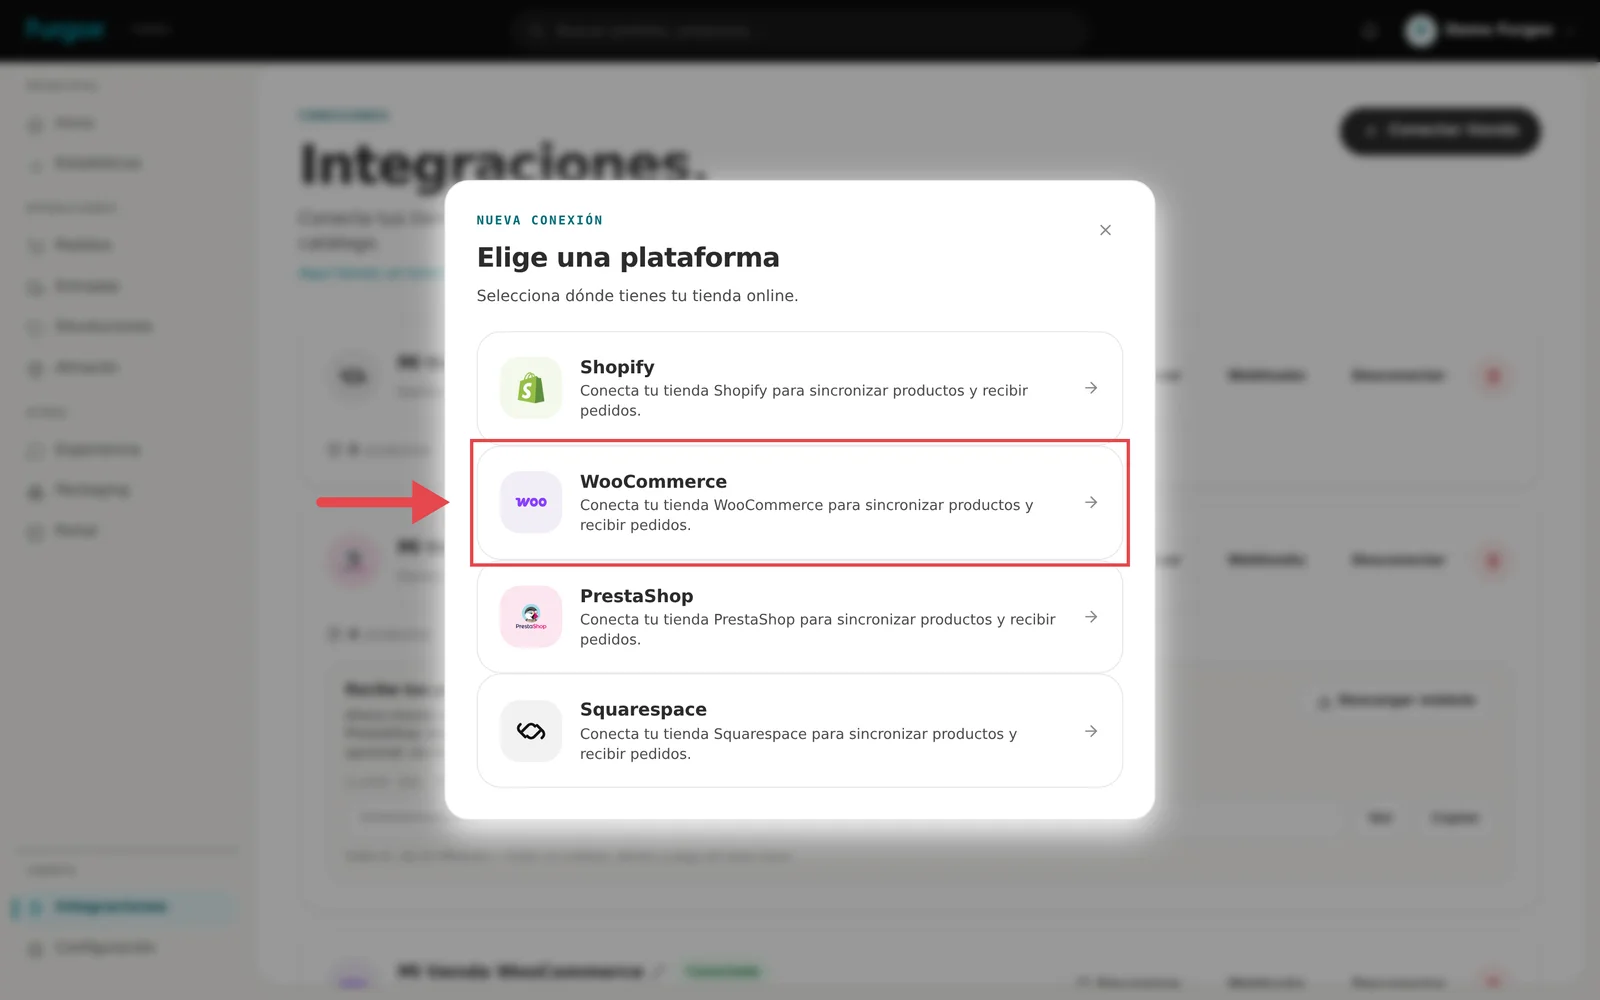
In your Furgox panel open Integraciones (Integrations), click Conectar tienda (Connect store) and pick WooCommerce.
2. Enter your store address
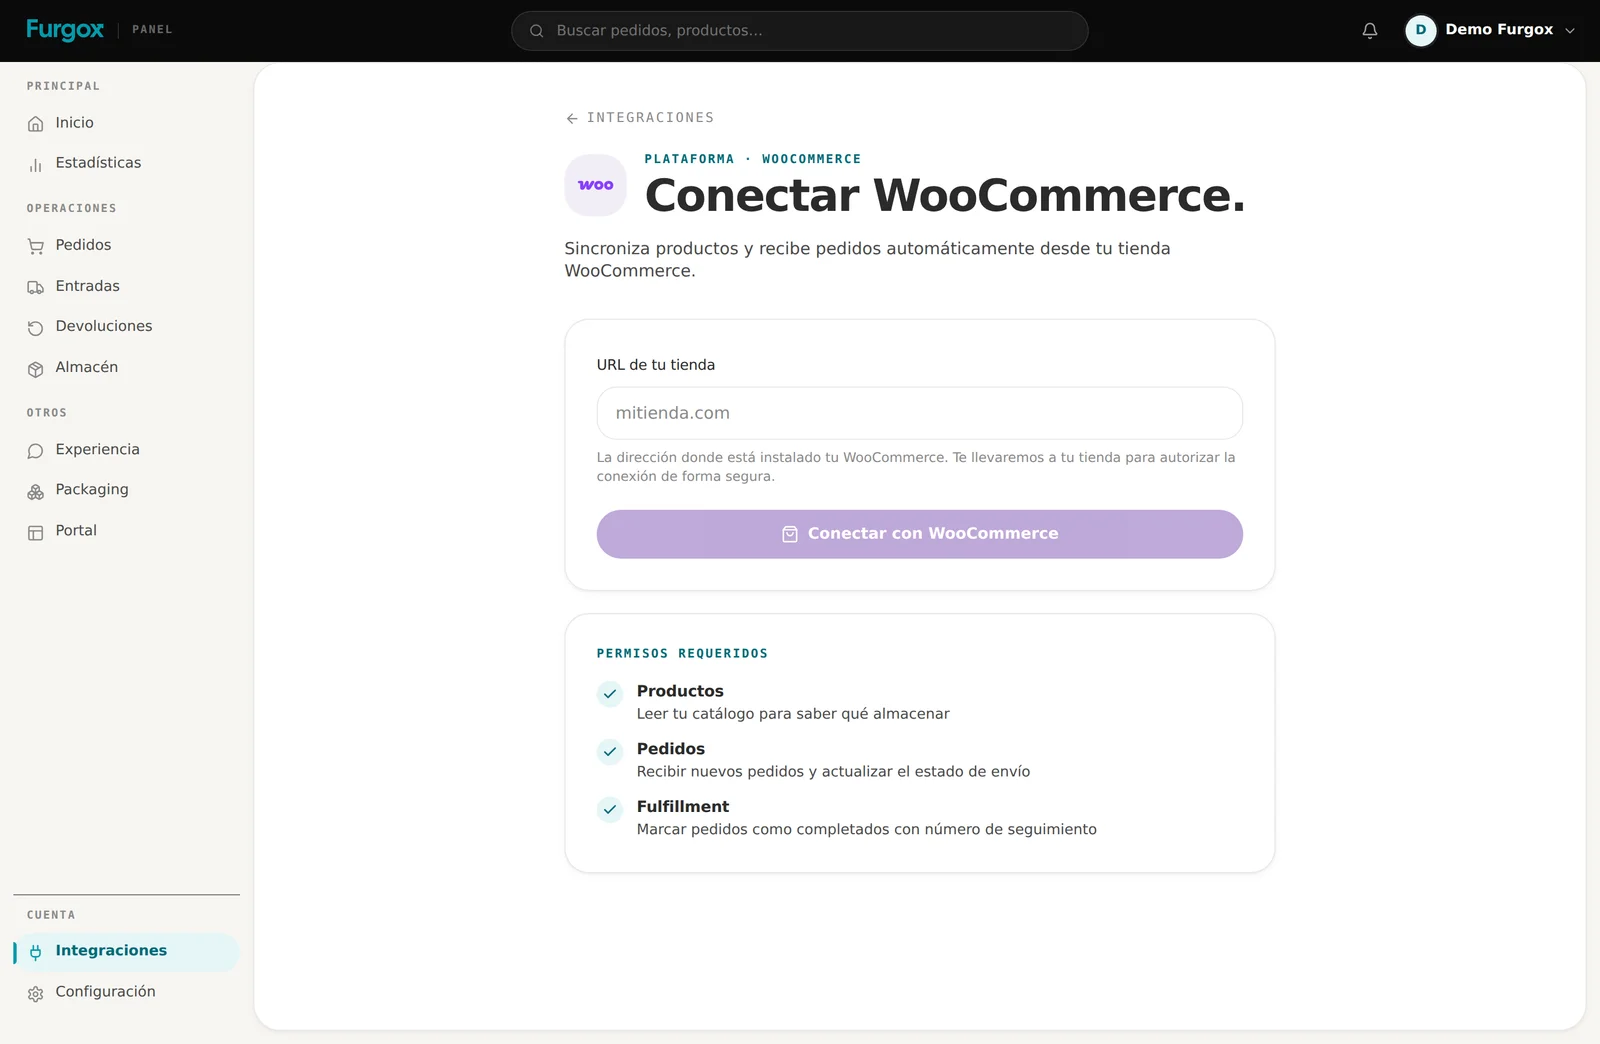
Type the address where WooCommerce is installed, exactly as your customers type it (mystore.com). If it lives on a subdomain or in a subdirectory, include that too. Then click Conectar con WooCommerce.
3. Approve the connection in your WordPress
We send you to your own store. If you're not logged in, WordPress will ask you to. You'll see a WooCommerce screen saying Furgox Fulfillment would like to connect with read/write access. Click Approve.
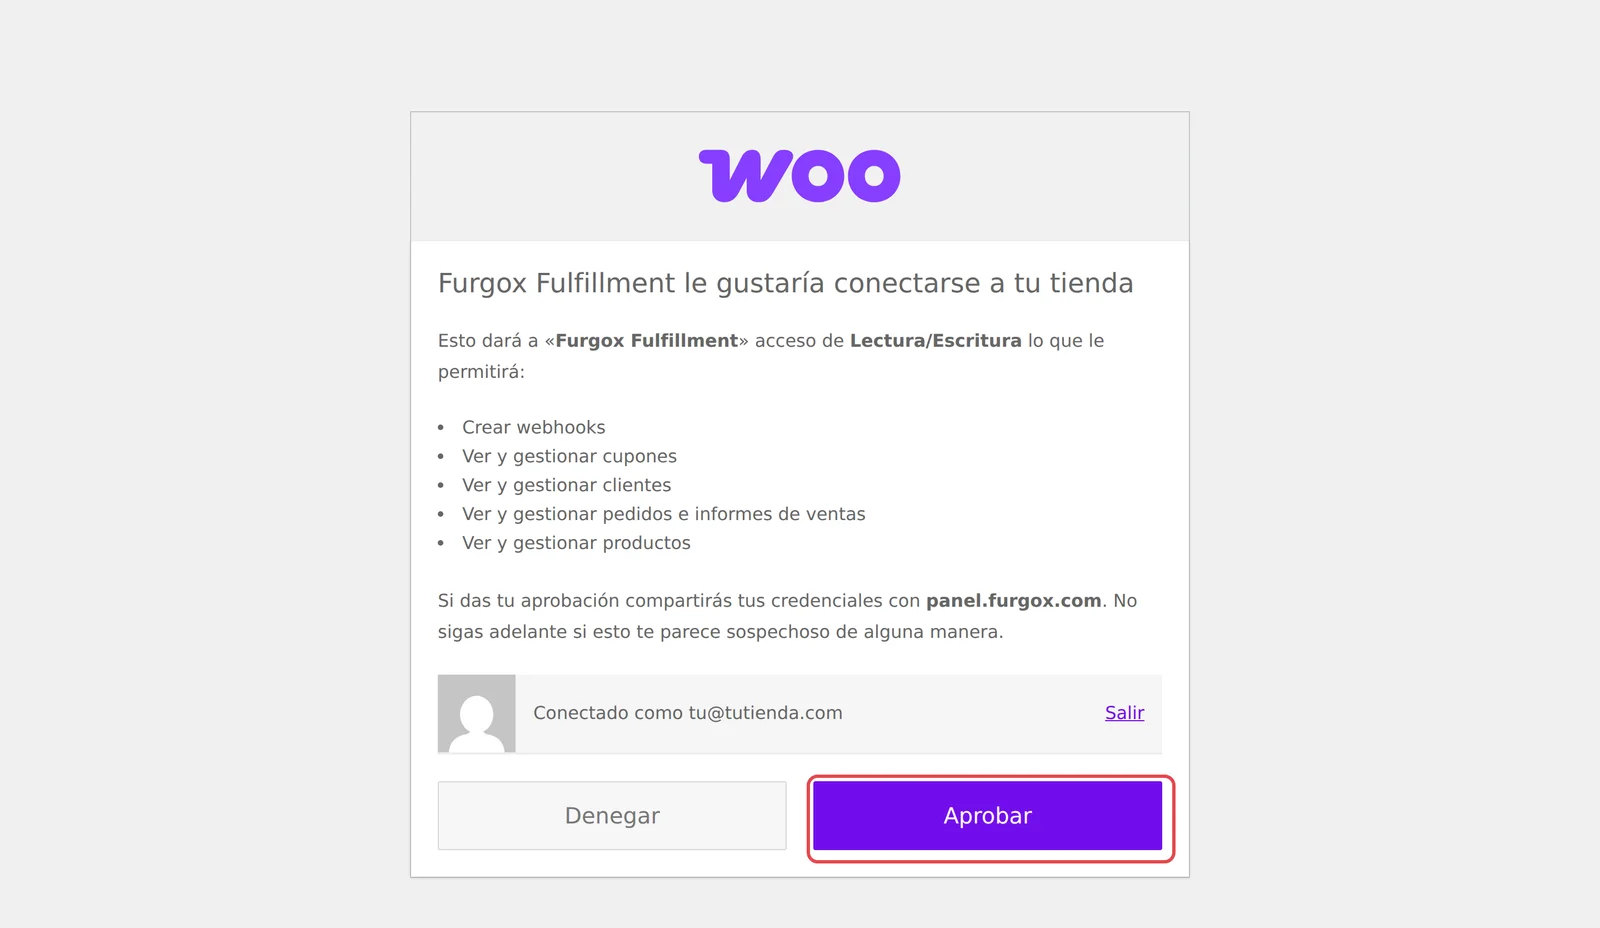
Write access is what lets us update stock and mark orders as shipped. Read-only would leave the rest of the work to you.
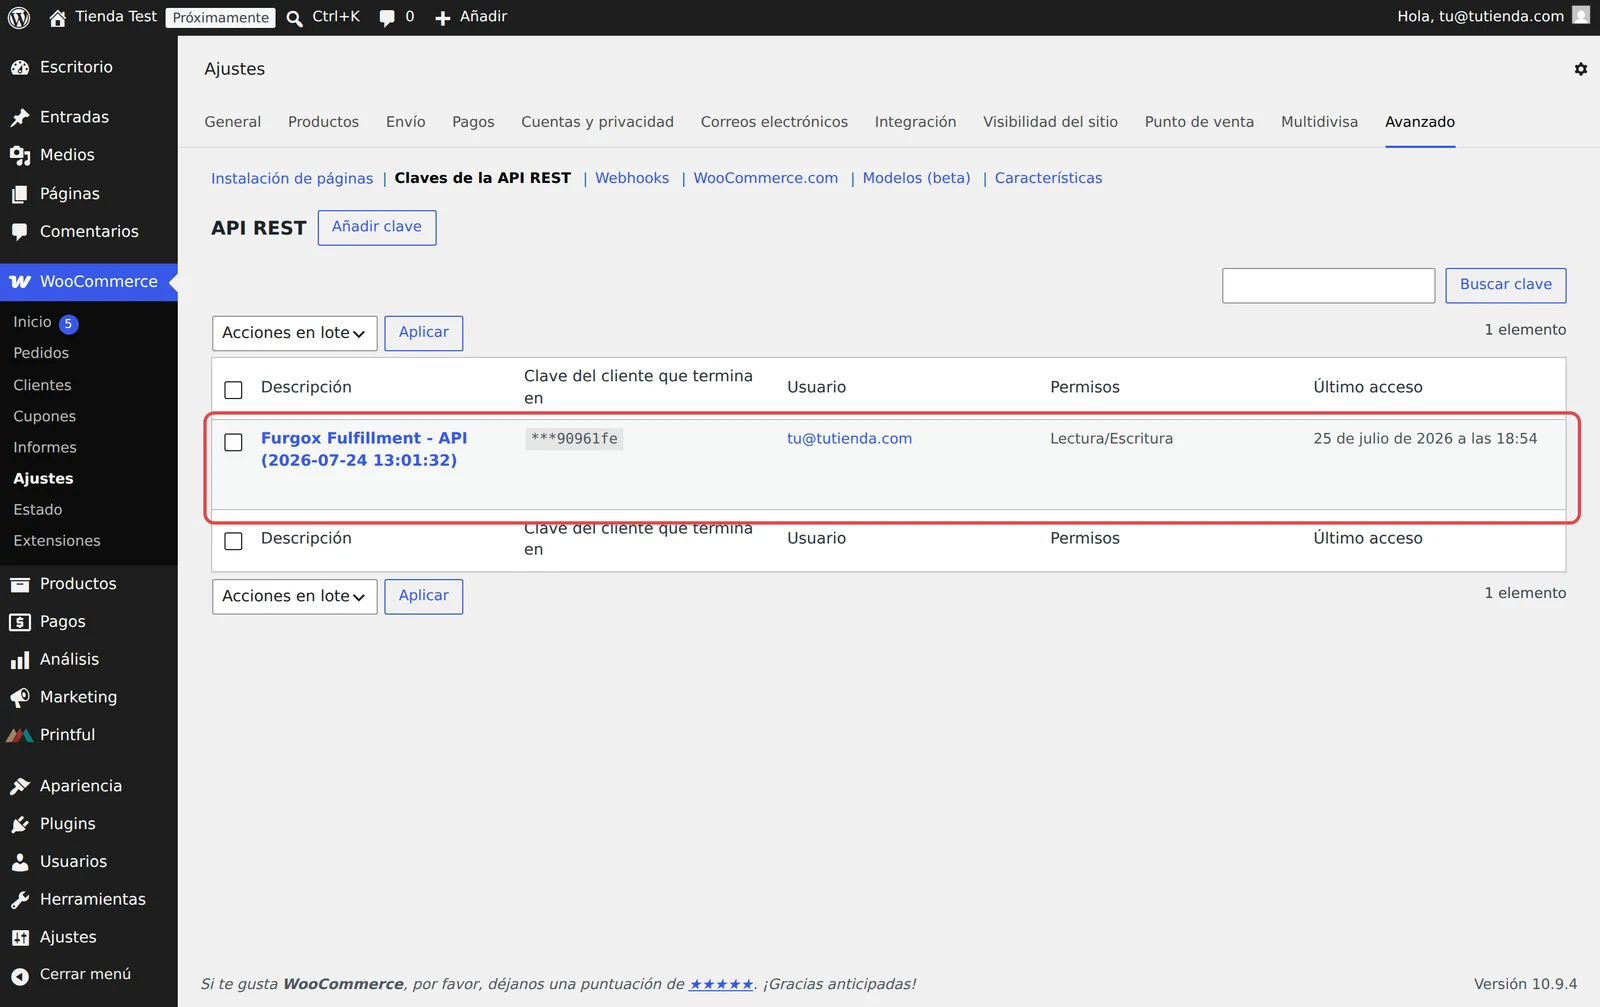
On approval, WooCommerce creates an API key in Furgox's name and sends it to us. You can see it — and revoke it whenever you want — under WooCommerce → Settings → Advanced → REST API.
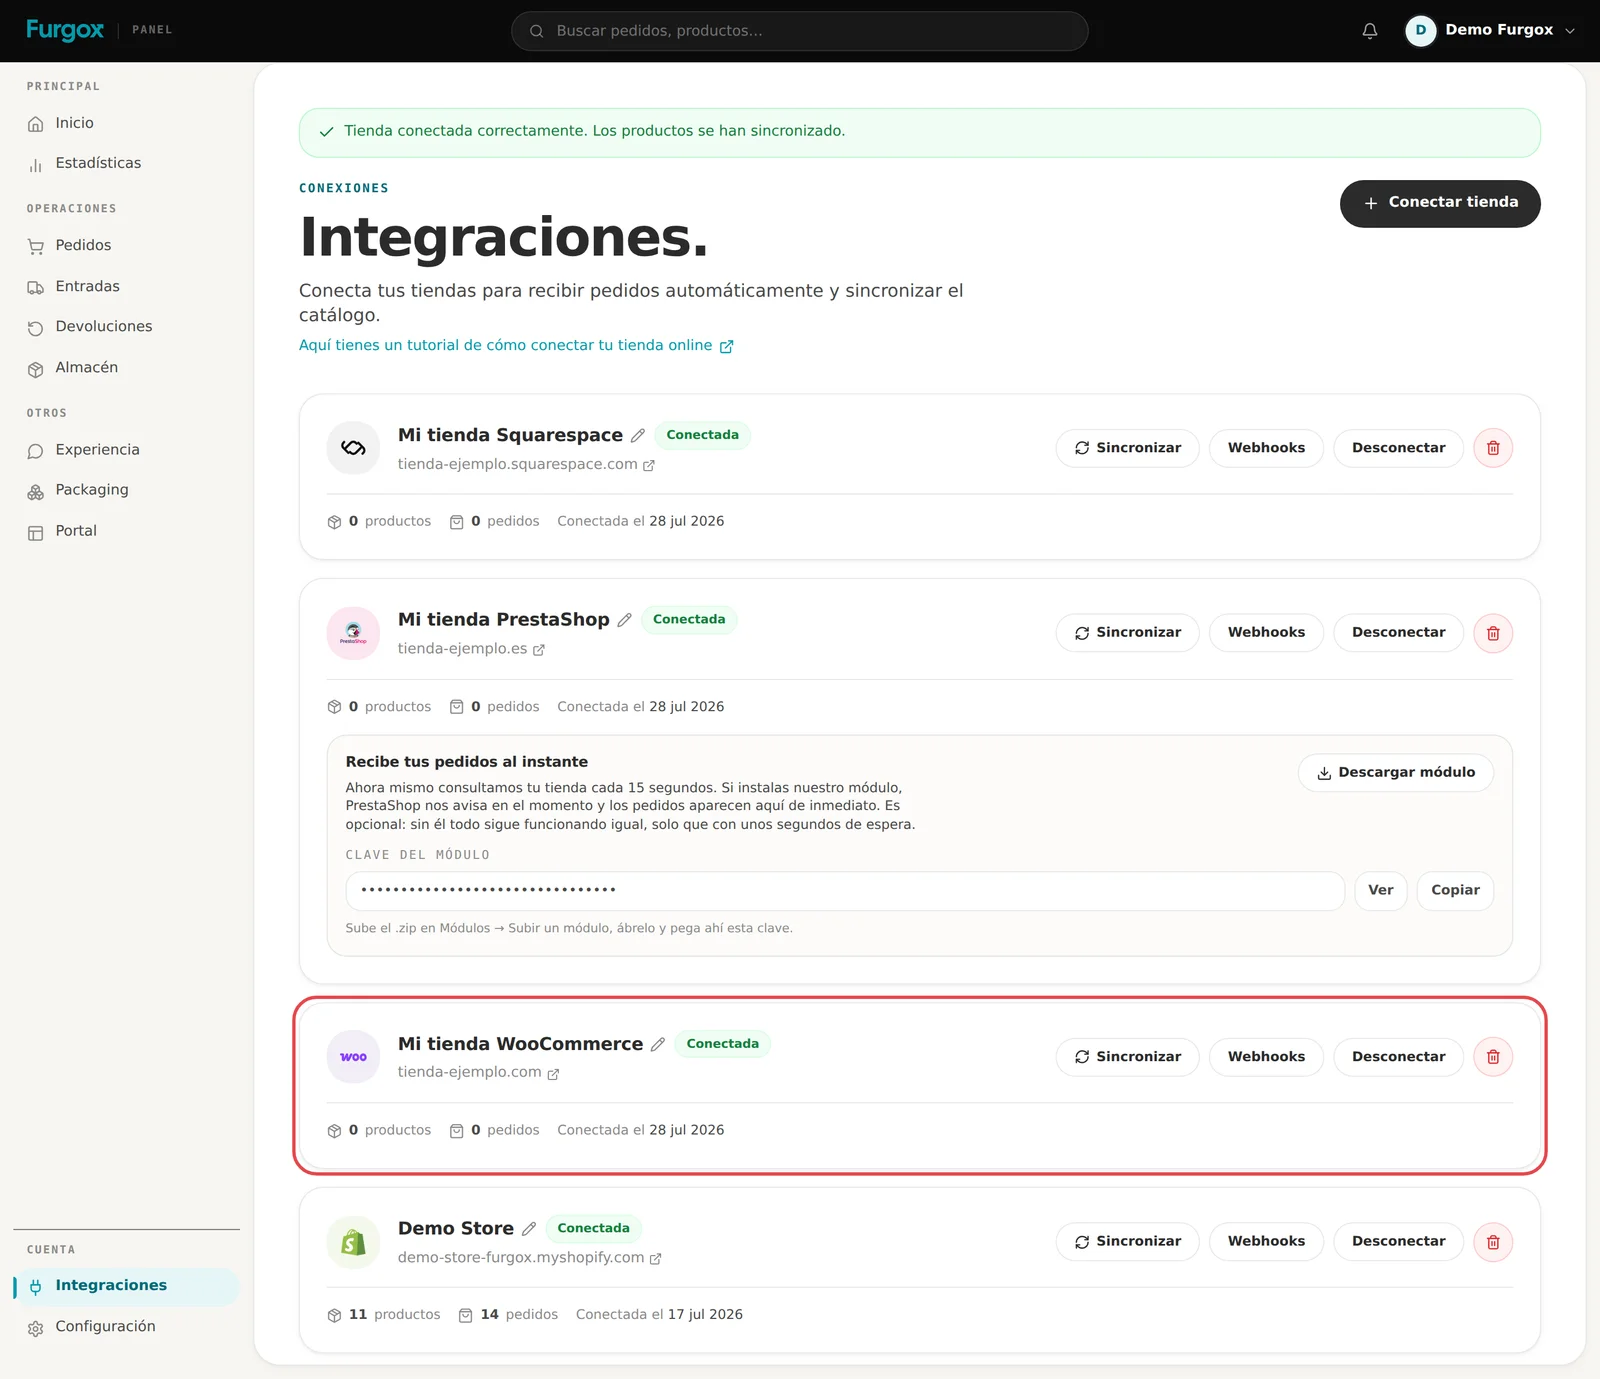
4. Done: your store is connected
You return to your panel with the confirmation notice. At that point we import your catalogue and your orders, and register the automatic notifications (webhooks) that tell us about every new order and every product change.
What happens from now on
Products
We import products and variations with their SKU, barcode and image. That SKU is the starting point: once the product goes into an inbound it gets its final Furgox SKU, which is how we recognise it on the shelf. On WooCommerce that code lives only in Furgox: your store keeps yours.
Orders
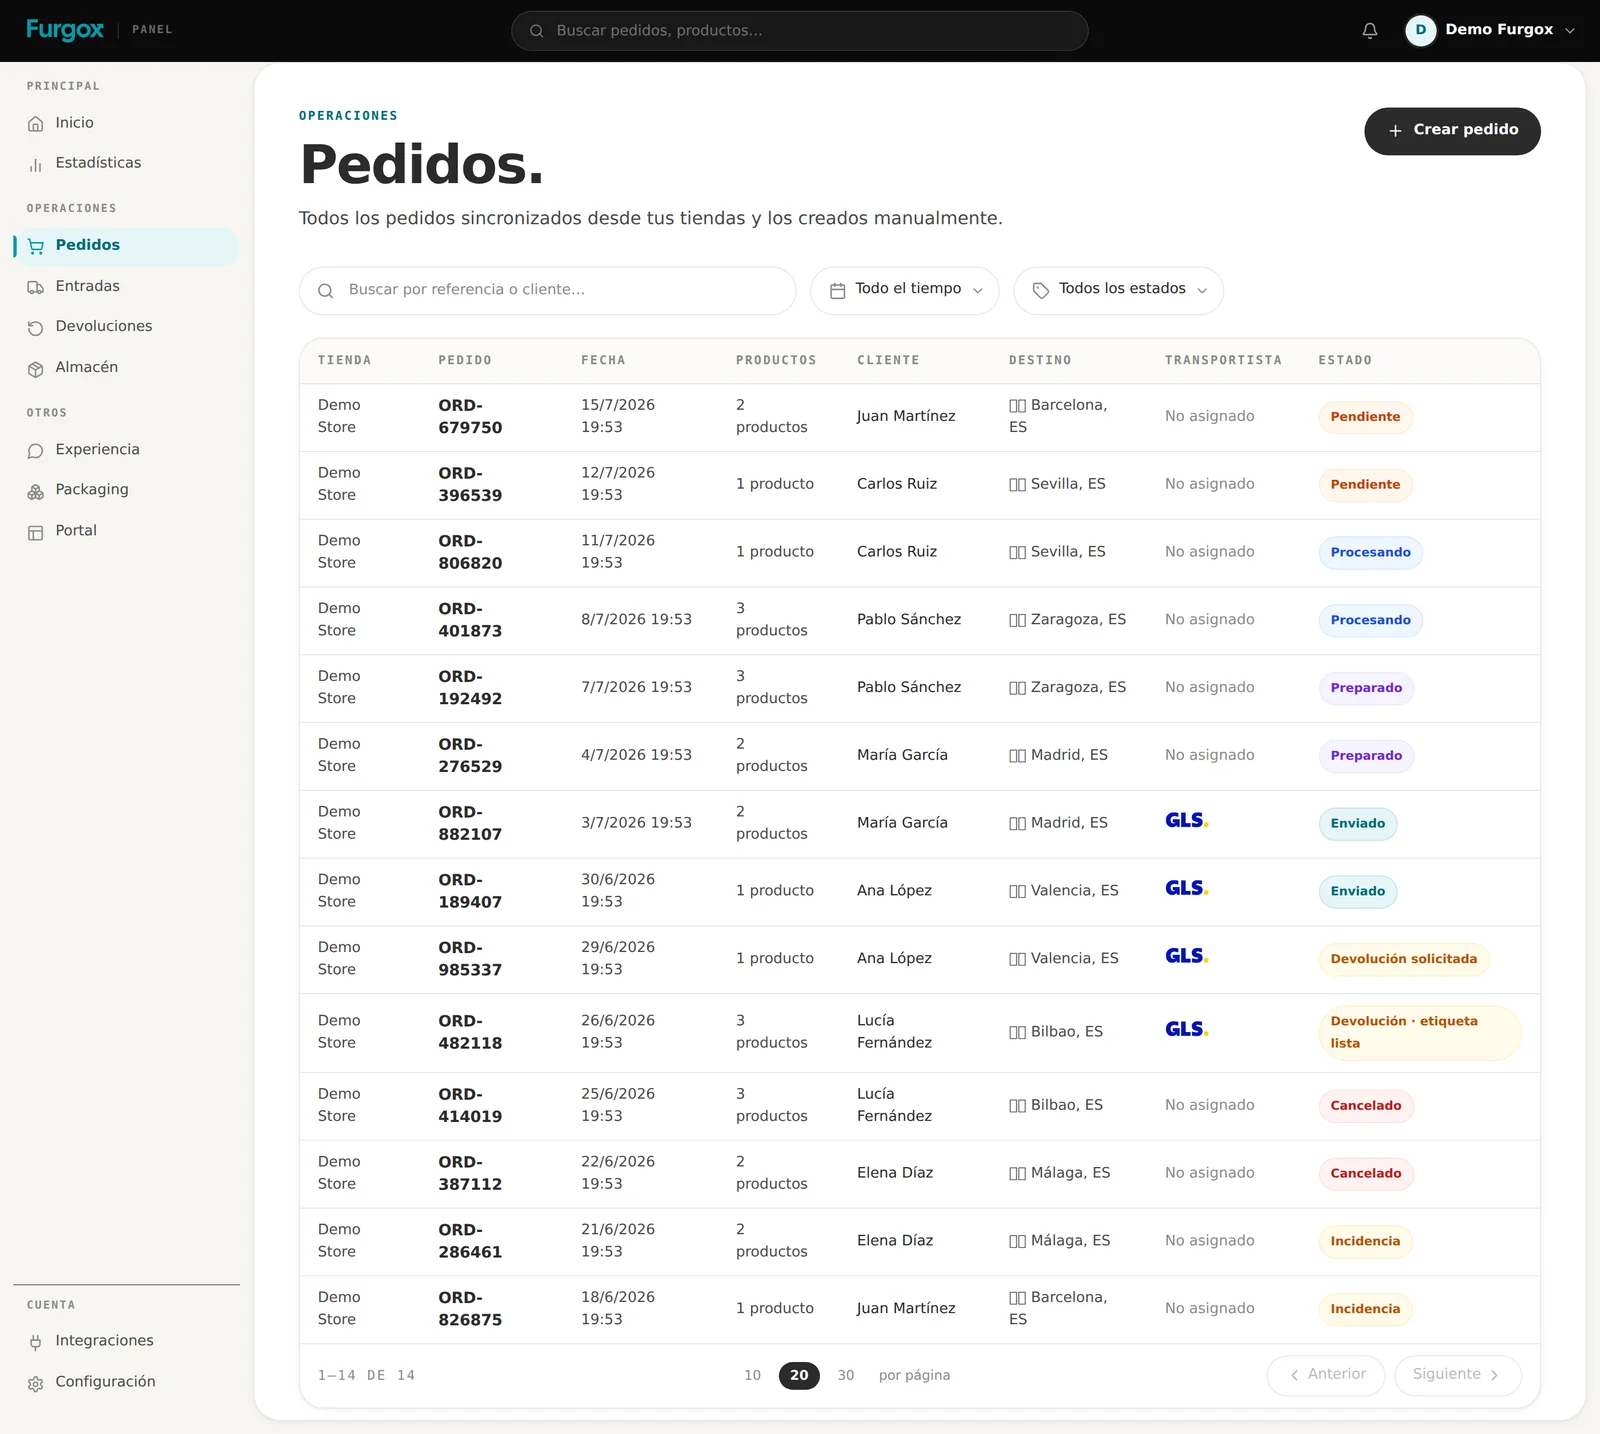
Every new order reaches Furgox straight away thanks to webhooks. You'll see it under Pedidos (Orders) with its fulfilment status.
Stock
We publish the units actually sitting in the warehouse back to WooCommerce as goods arrive and orders go out.
Shipping
When the order ships we move it to Completed and add a customer-visible note with the carrier and tracking number. WooCommerce has no native tracking field, so we also store it as order metadata in case you use a plugin that reads it.
If something goes wrong
The authorisation screen returns a 404
The most common issue, and always the same cause: permalinks are set to “Plain”. Change them under Settings → Permalinks (“Post name” works well), save, and try again.
“The data could not be sent” when approving
When you click Approve, it's your WooCommerce server that sends us the keys. If a firewall or a security plugin (Wordfence, strict Cloudflare rules…) blocks outgoing calls, they never arrive. Allow outbound traffic to panel.furgox.com and retry.
“This store is already connected to another Furgox account”
The same address can't live in two accounts. Disconnect it from the other account, or write to us if you think it's a mistake.
The store shows as “Desconectada” (disconnected)
That usually means the API key was deleted in WooCommerce. Click Reconectar on the store card and approve again: a new key is generated and no orders or history are lost.
What if I delete the Furgox key in WooCommerce?
Syncing stops: we stop receiving orders and updating stock. It's actually the quickest way to cut access if you ever need to. To come back, reconnect from the panel.
If you get stuck at any step, message us from the chat in your panel and we'll look at it together.